CSCI 441 - Computer GraphicsFall 2020 |
|
| | Home | Assignments | Leaderboard | Schedule | Resources | | |
The Trash Man
A1: Creating a sign This sign uses only a rectangle and a 180 degree curve with various transformations, rotations, and scales in order to write all of the letters. The trash can required a specially shaped rectangle, which meant a new set of vertices for the can itself. Codewise, the heirarchy was split into the logo and the three words. It was then split further by letters, so they could be redrawn if they were used in multiple words. Some letter functions had a boolean to draw in green or black. 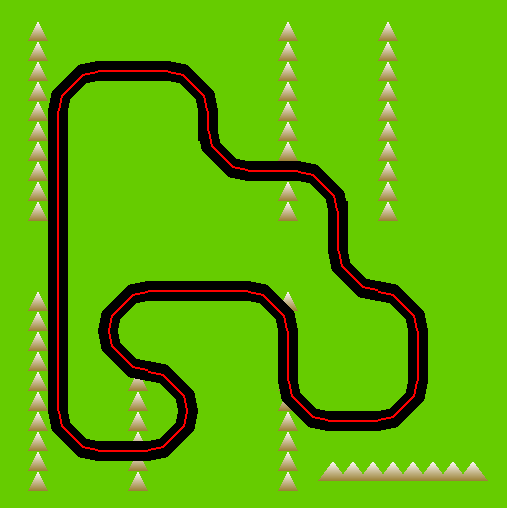
Lab 00b: Creating a rollercoaster The precursor to the sign at the top of the page, we were told to design a roller coaster, using GL triangle primitives. To do the curves in this assignment, I created 4 overlapping triangle fans. The outer track, the center line, the inner track, and then one to blend in with the green background. This was incredibly tedious,(and caused weird overlap) so I learned to use some trigonometry and triangle strips to draw curves in future assignments. 
Assignment 2: Animation and Interaction This assignment we were told to allow our character to move around a pre-coded map, with functions that will change the background. I drew up my character (The Trash Man), holding a trash can. I wanted 3 core functionalities: 1.The character can move 2.The characters arm follows the mouse 3.The user can left click to fire trash can projectiles To solve #1, I drew the full character, using multiple hierarchical functions. Eg. There was a drawCharacter() function that called drawArm() and drawLeg() functions which then called drawCircle() and drawRectangle(). This made them easier to change later. I then had two global variables (x,y) change when users pressed WASD, and applied them in a translation to the full character. To solve #2, I made the origin of the arm in drawArm() to be the shoulder, this made it easy to pivot it nicely. Using some fun trigonometry, I was able to find the angle from the shoulder to the mouse, at any time. I then applied this to the arm. The trashcan being held needed its origin to be the shoulder as well, so I applied the rotation before the translation to get it in the same spot as the hand. Finally, to solve #3, I created a custom object that held the location, angle, and number of remaining frames for a trashcan projectile. I made a vector that initialized new trashcans when the user released LMB. During drawing, the program iterates through all of the created trashcans, positions them, rotates them, sets the x and y for next frame, and decrements the number of frames left. When the cans run out of frames, they are deleted from the array. 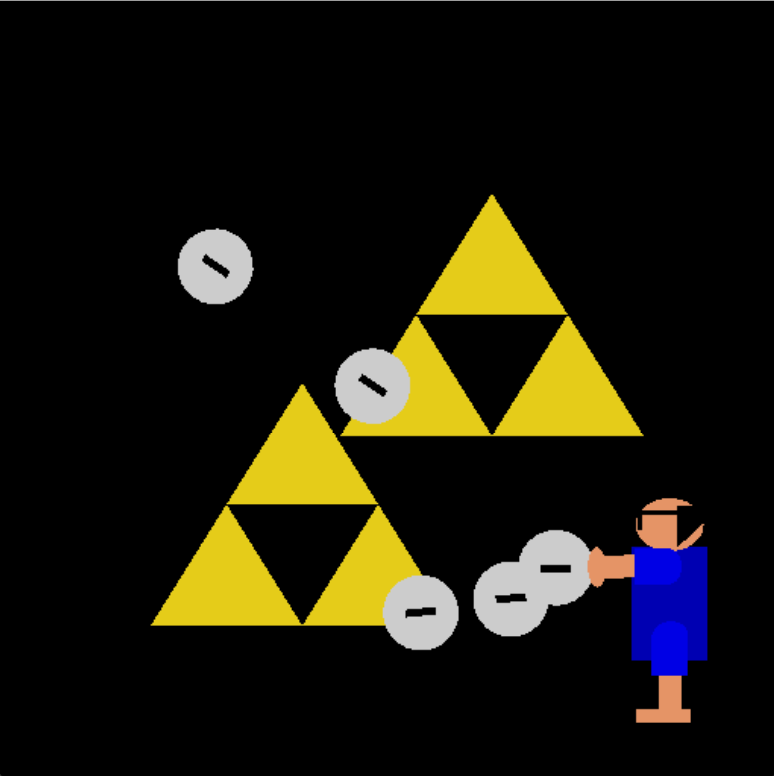
Another feature was that The Trash Man would flip directions upon moving left, which required a little tweaking of the arm angle code. To implement continuous movement, his head bobs as well. 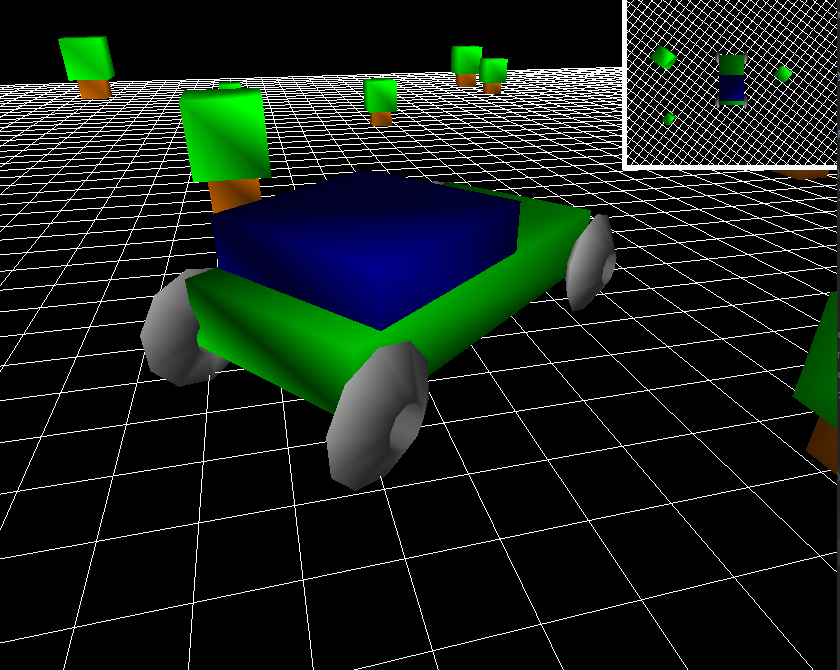
Assignment 3: 3D Animation and Cameras For this assignment, I created a simple car in 3D space. The features of this program included: -WASD controlled car (with animations) -Adjustable Arcball Camera -Picture-in-picture Sky Camera and First-Person camera This assignment was mostly an exercise in learning how to create our own cameras in 3D space, as drawing the vehicle was surprisingly similar to drawing in 2D. Once I had created a vehicle using the same hierarchy approach from Assignment 2, I built an arcball camera centered on the car. This is effectively a camera with free rotation about some point. The camera's direction is always fixed on a point, but its position is determined by spherical coordinates about that point. I made the camera unable to rotate under the car, or flip itself by crossing directly above the center. Once I made the camera itself, adjusting it to zoom in and out was simple enough, since all I had to do was change the radius the camera was giving the car. The other cameras weren't as hard, but definitely were interesting to figure out. The sky cam was simple, since it always was located directly above the car itself at a fixed distance, and it was always directed at the center of the car. However, The orientation of the camera needed to change when the car turned (to keep the car centered up/down). This was done with basic trig in the X/Z plane above the car. The first person cam was a little harder, since I wanted it positioned towards the front of the car. To place the cam further forward, I needed to use more trig, since the distance of the hood in X and Z from the center of the car depends on the car's angle. The camera was placed at a radius from the center that looked nice, then the direction was pointed at a radius slightly larger (with the same angle), so the camera always pointed towards the direction the car was facing. 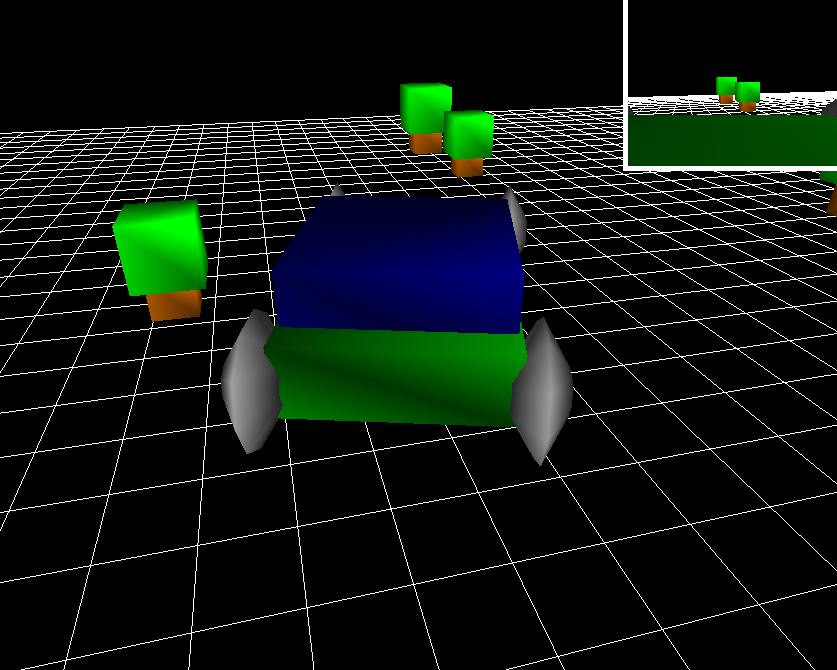
(first person cam in top right) 
Assignment 4: Point Lights and Custom Shaders For this assignment, I implemented my first experiment with a full Phong Reflectance model using Gourad Shading (more on this in the midterm project). This was just two additive point lights being placed on the scene created in A3, using a floor that could show that the light models were working. The only key difference between this assignment and the midterm (shader-wise) is that I tried plugging in different colors for the diffuse, spectral, and ambient components, which made the object highlights a little more obvious in the dark scene I had. 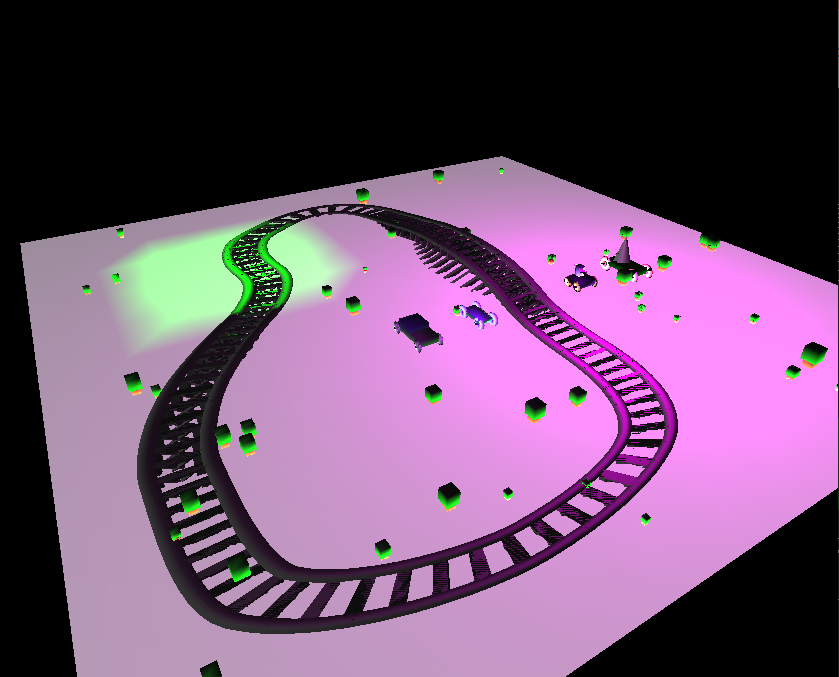
Midterm Project For this project I was super glad I went all-out on Assignment 3. This let me focus on coding up some really nice looking shaders for our midterm project. I reused a ton of code for my car, the first person PIP, and the arcball camera. The shaders are split into a vertex shader and a fragment shader, where effectively the vertex shader does all of the work. Using a bunch of vector and matrix math, I was able to implement the full Phong Reflectance Model with Gourad Shading. The Phong Reflectance Model refers to calculating light as a function of diffuse (light hitting the surface), spectral (refracted/reflected light creating highlights), and ambient (extra light to make things look nice) components. Gourad shading refers to each vertex being shaded individually, which is why the vertex shader does all of the calculations to find the color the lights give each one. The three lights I implemented were a directional light, a point light, and a spotlight (shown below). 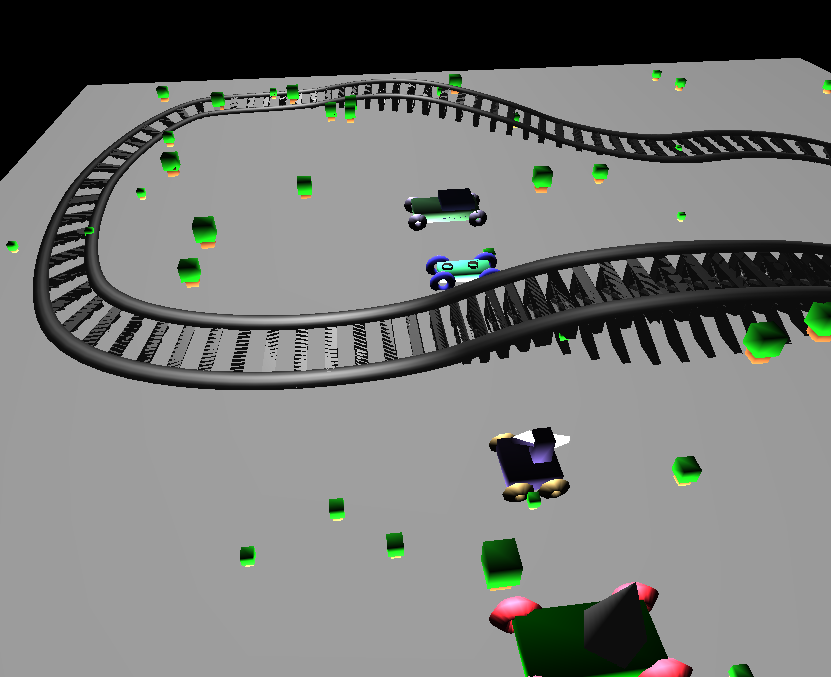
The direct light just hits every vertex from a particular direction across the world, and doesn't look really realistic. Despite this, highlights are still present from the spectal component of the light (shown on roller coaster). 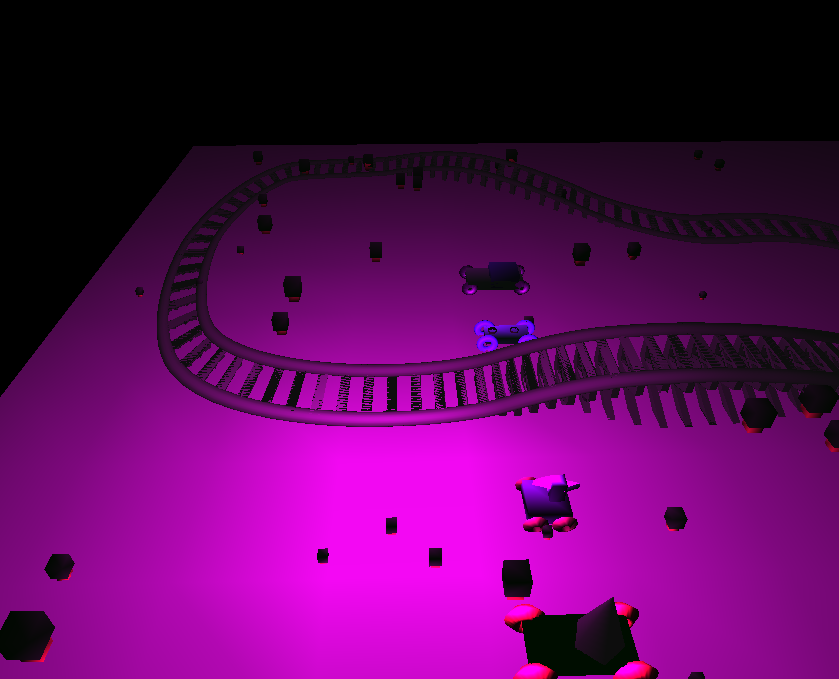
The point light was a nice magenta color. It is calculated based on an exact location,then the direction and distance to the light is relative. There is also attenuation to account for distance from the light, so it looks very pretty when the math is done right. 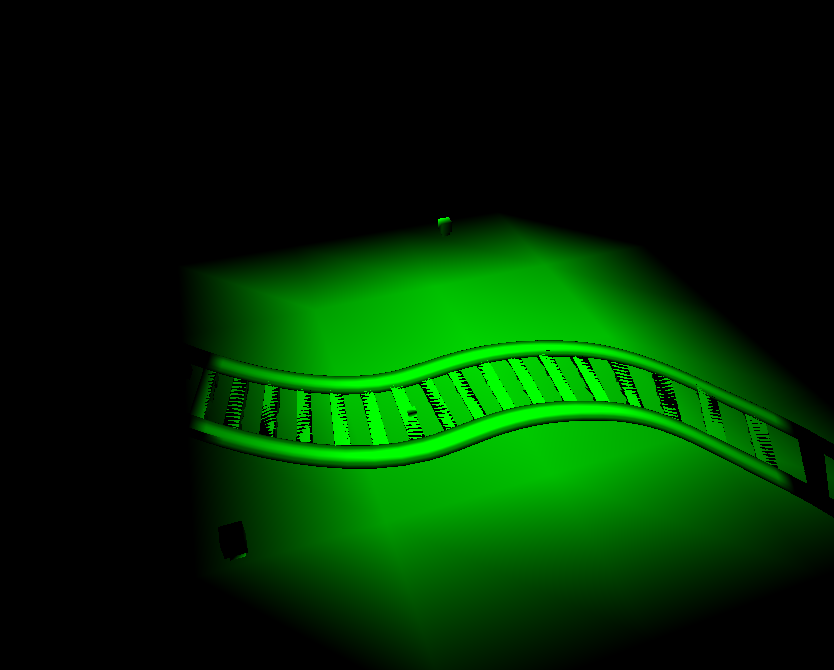
The spotlight has everything the point light has, plus an angle to compare the vertices to, to see if they are in the area we're looking to cast light to. To make the spotlight more realistic, I added both a "fall-off" angle and attenuation to make a very soft edge on the spot generated. 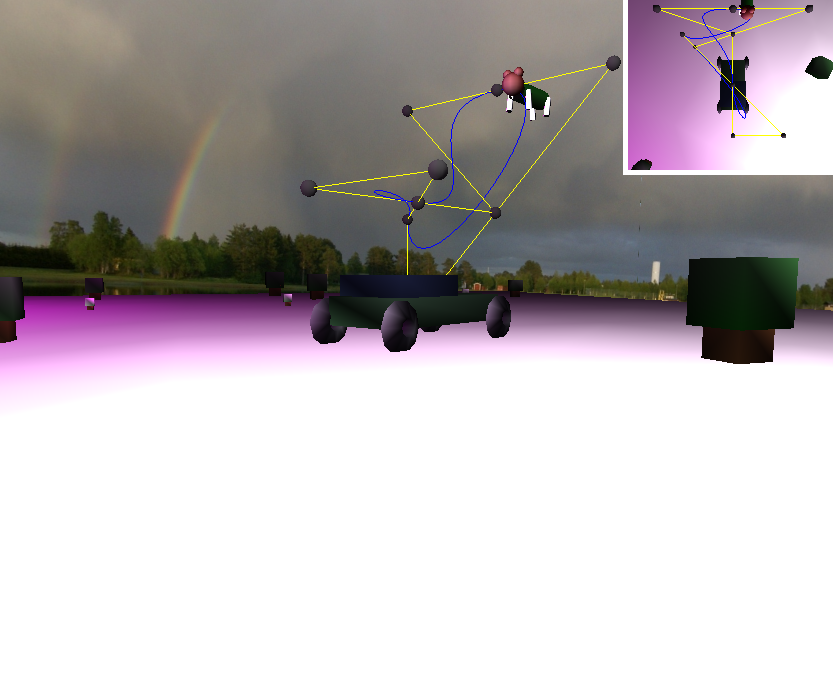
Assignment 5: Bezier Curves and Texturing There were two parts for this assignment that were added on to Assignment 4. First was the ability to load Bezier curves from a .csv file, and second was a textured skybox. A Bezier curve is effectively a curve made from the interpolation of 4 control points in (x,y,z). By using an interpolation equation and splitting a bunch of points into groups of 4, a number of points can be interpreted as a number of curves. I put a model onto that curve, and had it traverse part of it each frame by using the same equation. This made it look like the weird bear model was flying around the car. (Control points are shown as spheres, the curve itself is blue) 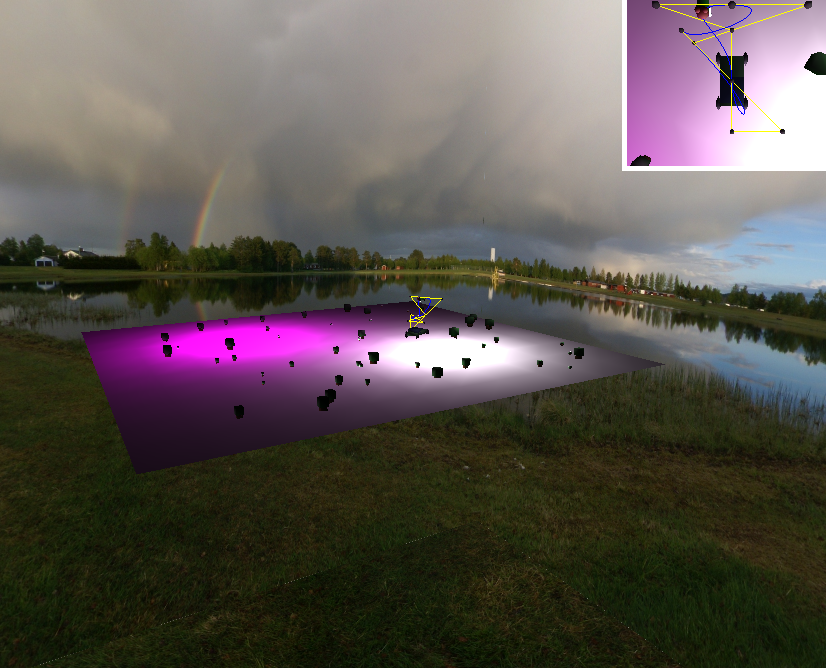
The next main piece was the texturing of a skybox. I used a texture from http://www.humus.name/index.php?page=Textures&start=56, and had to individually place 6 quads (square made from two triangles) around the scene, and texture each with its respective image using a different shader. 
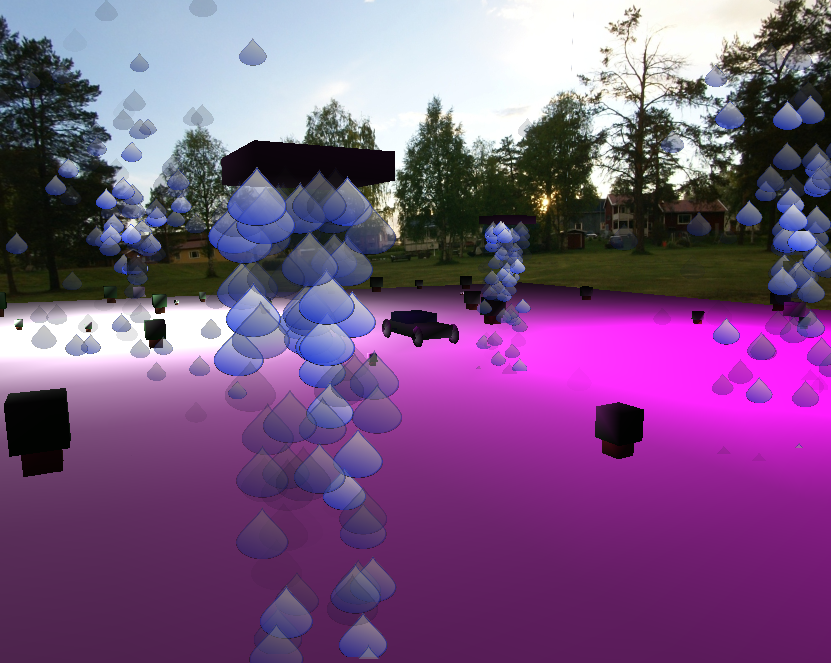
Assignment 6 - Particle Systems This assignment was one of the most involved in implementation. In order to create the raindrops from the clouds/fountains, I needed to set up multiple different functional parts. First, was an object-oriented approach to coding them. I set up a class that managed the systems themselves, and a class that managed each individual particle. This way, the particle class could handle updating itself, while the system class would handle creating/destroying/sorting them. Using some random numbers within specific bounds, the system class created particles, and called their update functions to let them moved based on simple physics variables (location, velocity, acceleration). I had some experience in this tanks to the Game Design course. Then, I used a geometry shader that utilizes a billboarding technique to make sure the textures are always facing the camera. A "particle" is actually a single point in space, to be interpreted as a square with a texture on it. The final step was to sort the particles, and continuously change the data being sent to the GPU. This involved making a buffer large enough to hold the maximum amount of particles possible, and subbing in data to it as needed. 
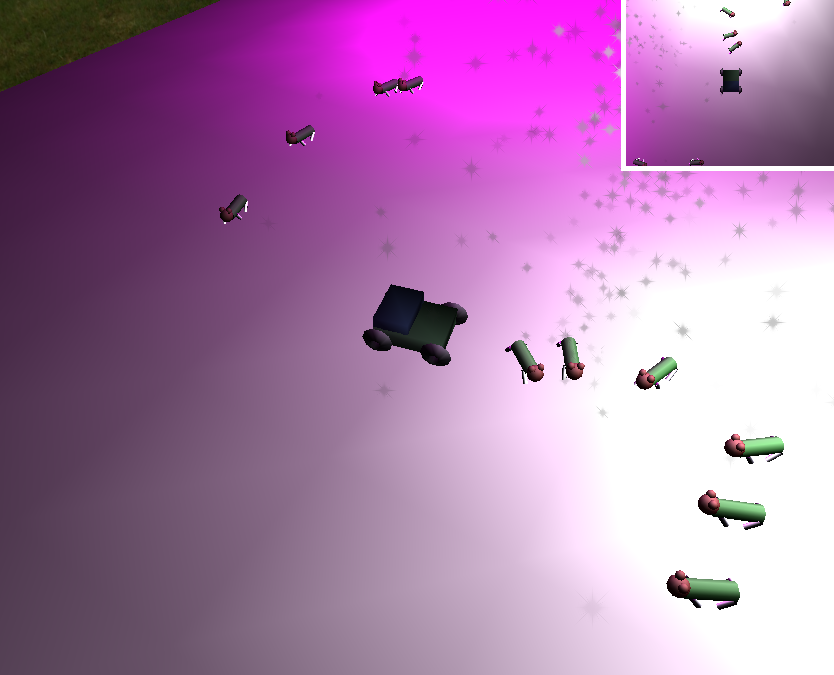
Assignment 7 - Flocking Enemies + Collisions This assignment also had a lot of moving parts, many from previous assignments (the particle system for confetti, the sky camera, the car, the mascot, the skybox, etc.). The new additions were split into two large categories: the enemies and collisions. To make the enemies sort of "flock" to the player, every frame they figure out the angle between their current heading and the player, and they change their headings by some small amount to close that gap. This makes them turn slowly instead of snapping to the player's direction. I made a large class to manage all of the enemies, and a smaller one to draw/animate each individual, and handle operations that only need the enemies' own information. Within the larger class that was able to manage all of the enemies, I then implemented collisions. This is based off of simple collisions, where every object in the world has a spherical area around it that shouldn't overlap with others. If an enemy collides with something, it flips in the opposite direction, and is bumped in that new direction to avoid multiple collisions in consecutive frames. If the player is hit 3 times, they lose, and if they collect all of the orbs (by colliding with them) they win, and a particle system sprays confetti. 
Final assignment - Putting it all Together For the final assignment, our group worked to put together a simple horror game using all of the techniques learned throughout the class. 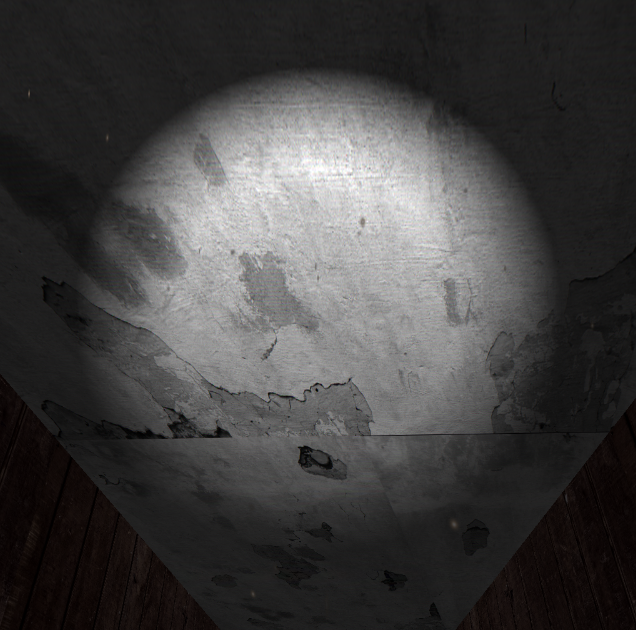
Most of my contribution was working with the class-based objects to create a scene. For example, the hallways the game takes place in are singular segments that will continuously swap in front or behind the character to create an infinite hallway for the player. In order to make the textures look nice with the flashlight, the lighting was done through a fragment shader instead of a vertex shader. This way it pulls the texture's color based off of the fragment instead of the vertices sampled. The flashlight was done by creating a spotlight similar to the midterm project, but attached to the player and camera direction. 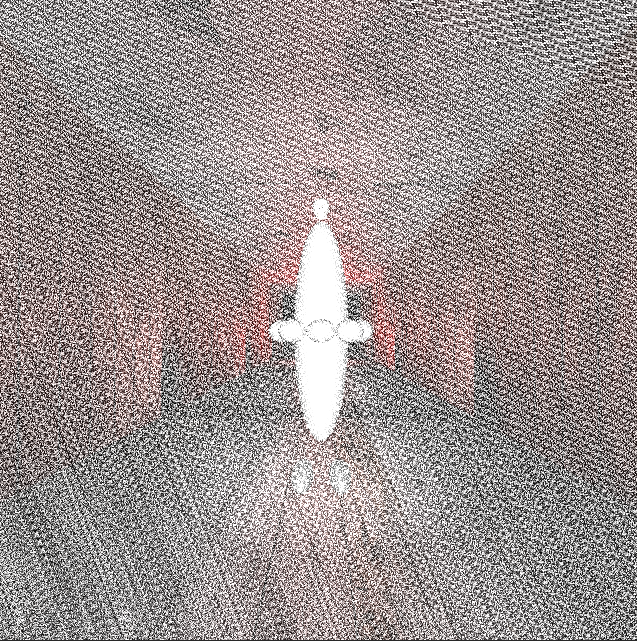
The dust particles in the room were generated from an adapted version of the particle system, and a group member utilized multi-pass rendering techniques to add static when the enemy got close. We added win/loss conditions using basic collision code, and it turned into a nice looking project overall. | |