This assignment is due by March 05, 2021 by 11:59pm.
Part I - Create the Geometry & Fragment Shaders
Hopefully everyone will be starting with a cube to begin this assignment. We'll still be using UBOs to pass the uniform data to our programs. If you like, you can keep the subroutines and keep expanding upon your prior submission.
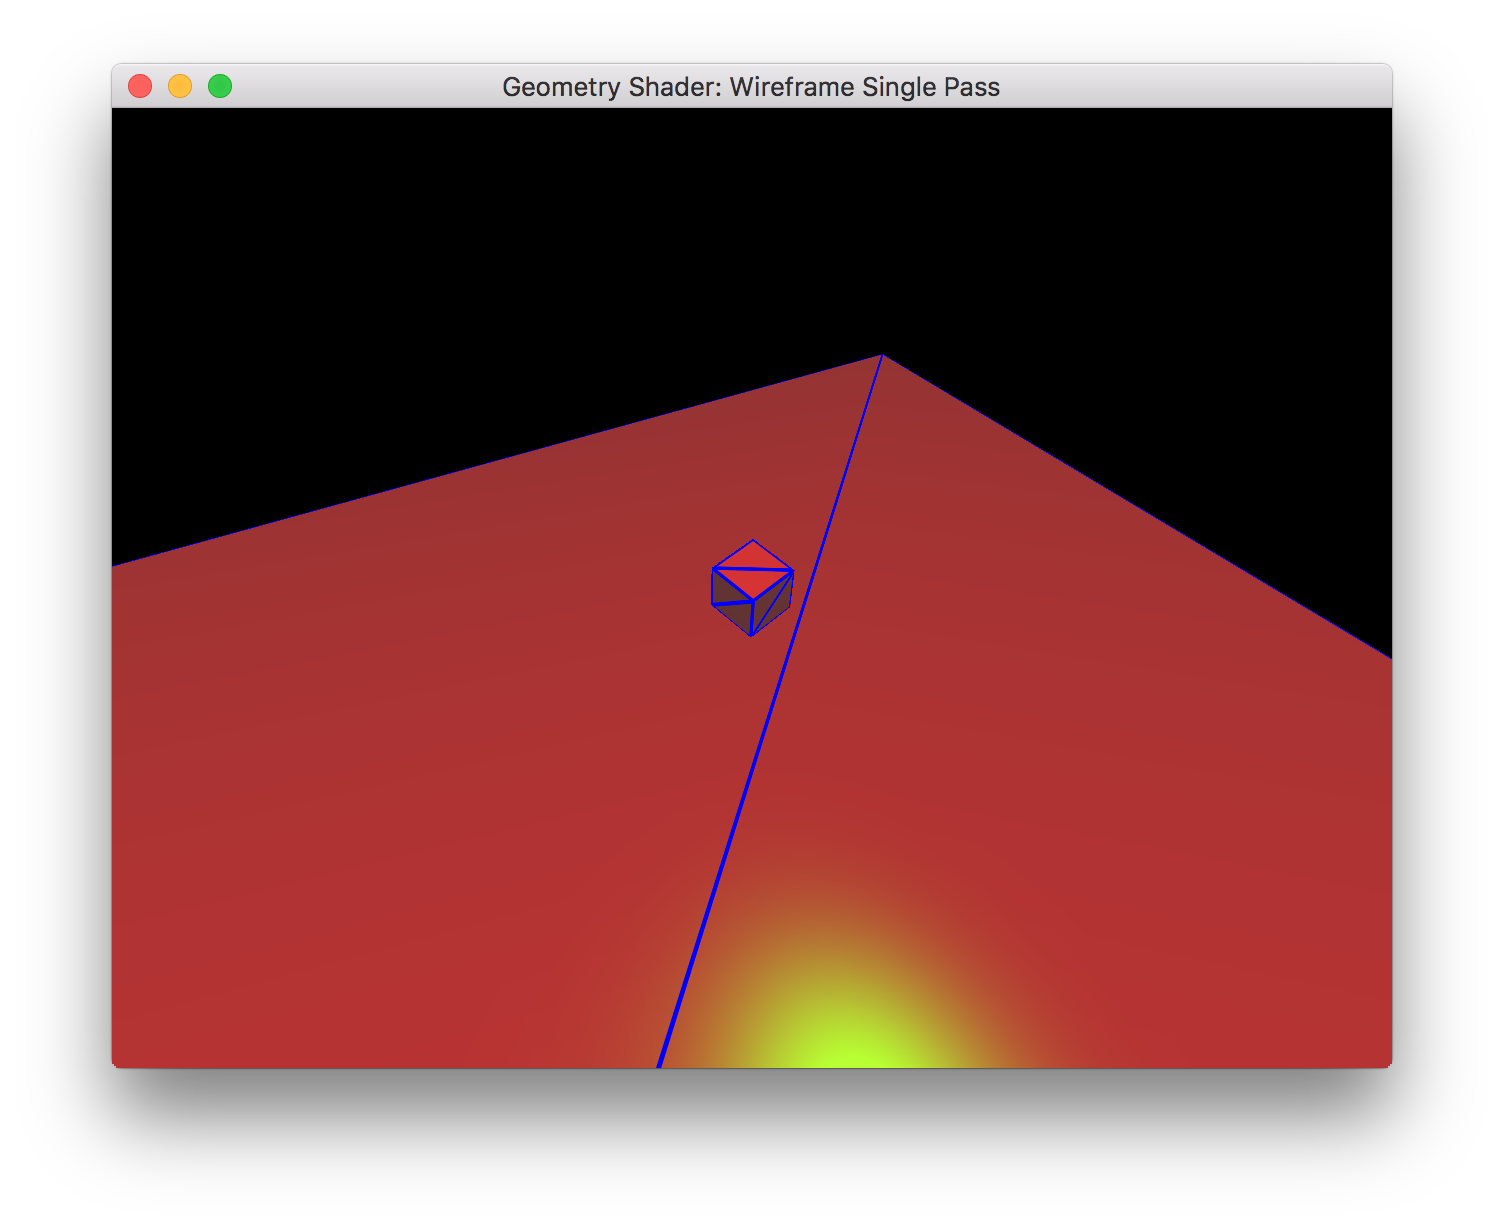
The first step we want to do is to create our single pass wireframe renderer. Specifics are given in SLC. Your program should generate an image similar to below:
Part II - Read In Model Control Points
Once your wireframe renderer is working, let's change what we're drawing to something a step more interesting. Select one or all of the following model files to load.
You will need to open and parse the file to create your
GL_ARRAY_BUFFER
VBO and
GL_ELEMENT_ARRAY_BUFFER
IBO. Once those values are read in and passed to the buffers, delete
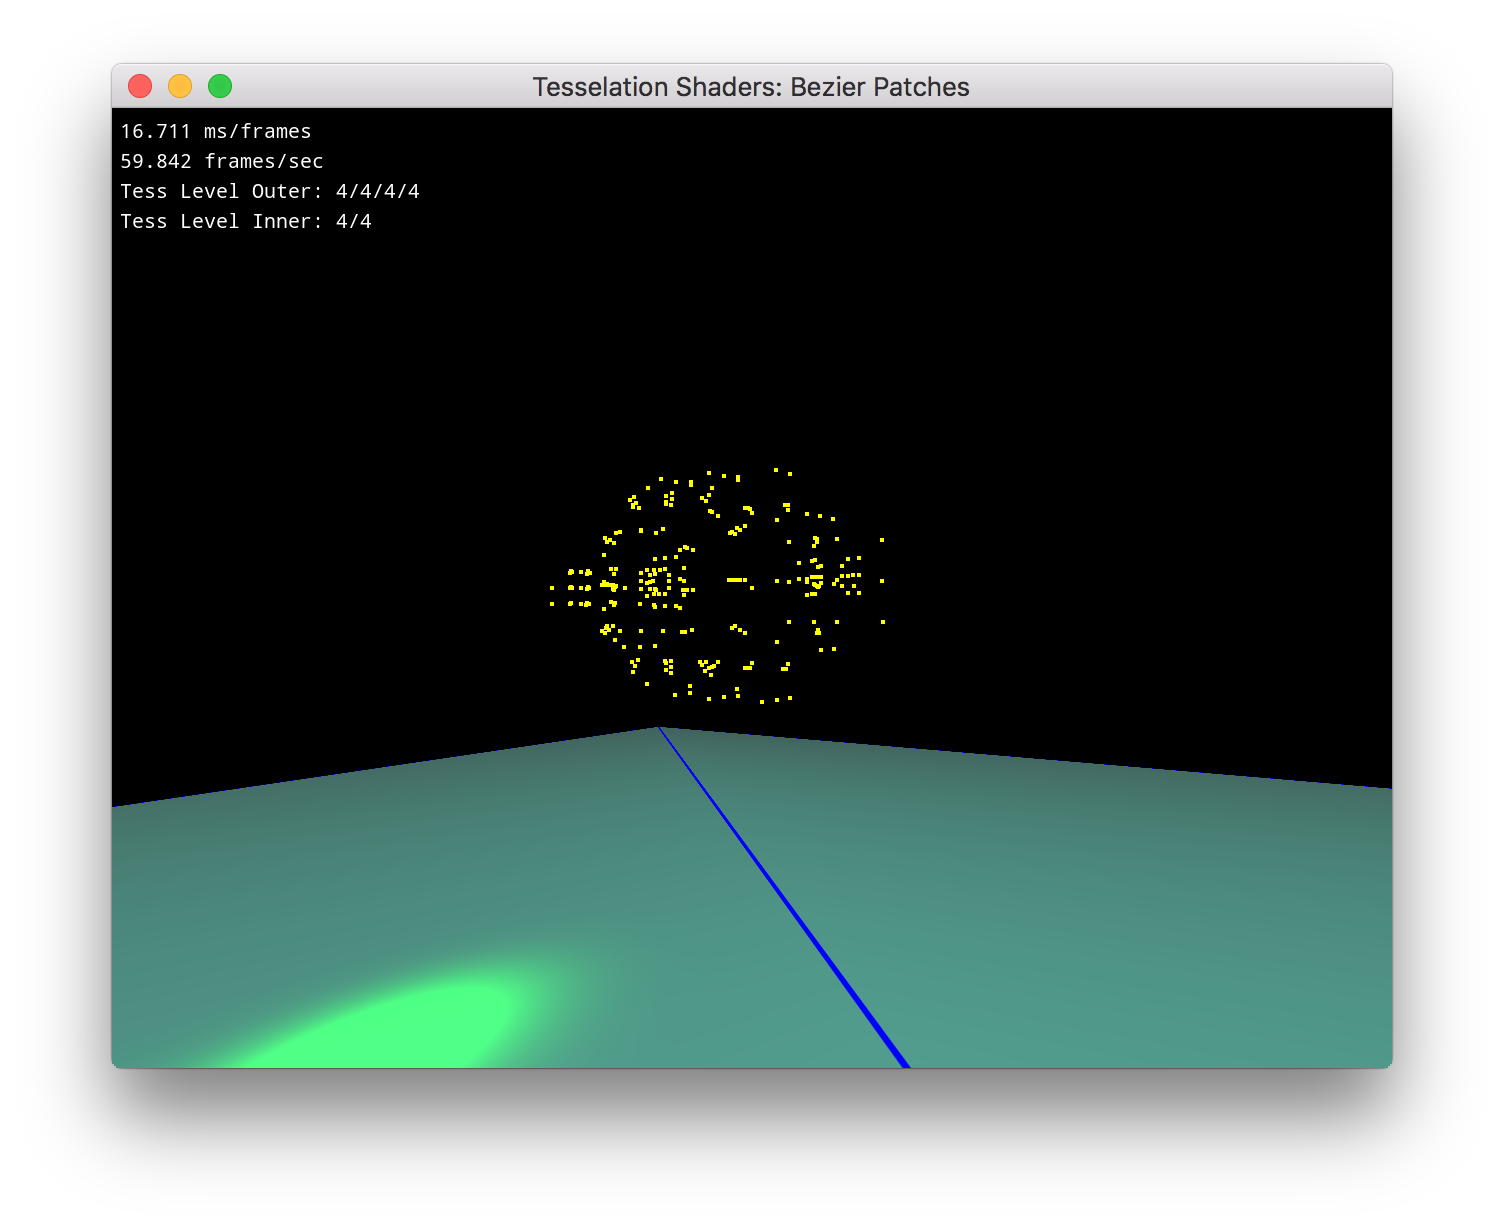
your code that draws the cube. In it's place render your VAO using
points to see all the control points. You should be at this step:
Part III - Create the Tessellation Shaders
Now it's time to add in the Tessellation Shaders. You will need to create both the Tessellation Control Shader (TCS) and Tessellation Evaluation Shader (TES) for this step. Note: you will need to be using the existing wireframe shader on your ground and this new Tessellation + Wireframe Shader on your teapot. Create your files and shader programs accordingly.
Your TCS will need to set the Outer and Inner Tessellation Levels appropriately. Decide if you want to hardcode these values in and fix the Tessellation Level or allow the user to interact with the program modify these parameters in real time.
Your TES will need to perform the actual Bézier Patch calculation. Again, refer to SLC for these equations.
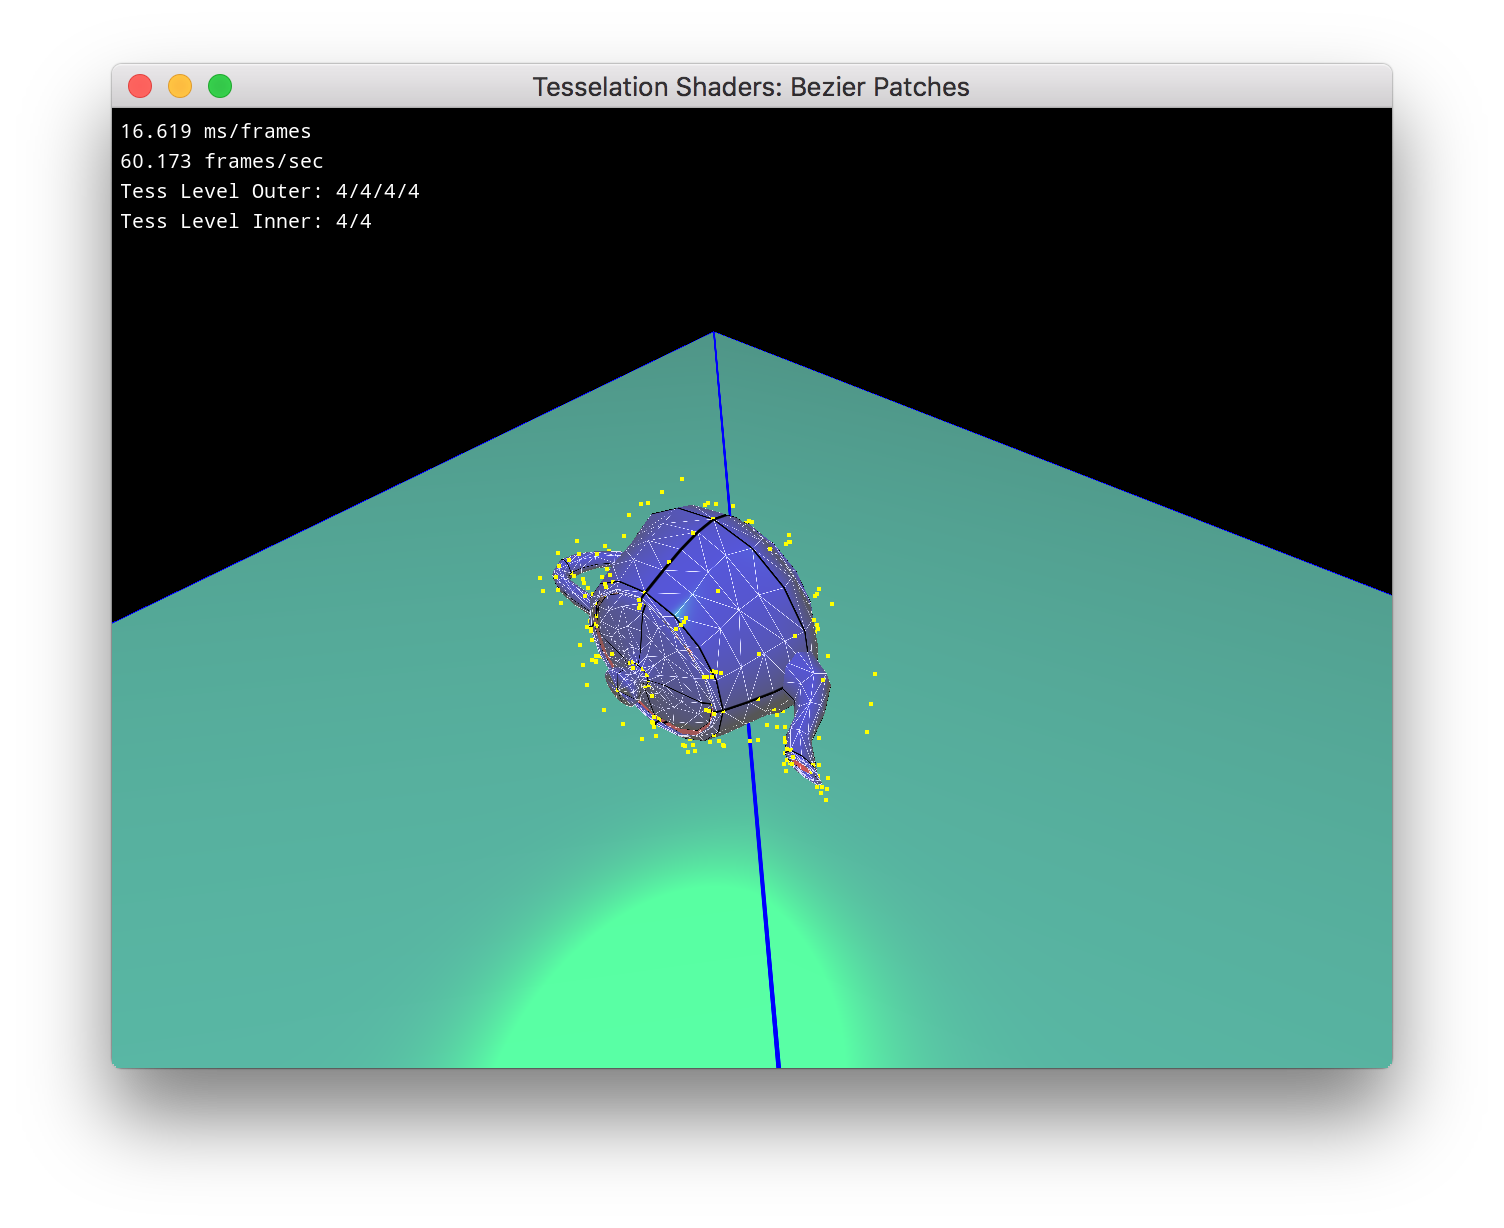
Be sure your Geometry and Fragment shaders follow the Tessellation Stage so we still are drawing the wireframe. You do not need to worry about the two coloring for patch and triangle edges. It is fine for all edges to be the same color. With the wireframe on, you should have the following:
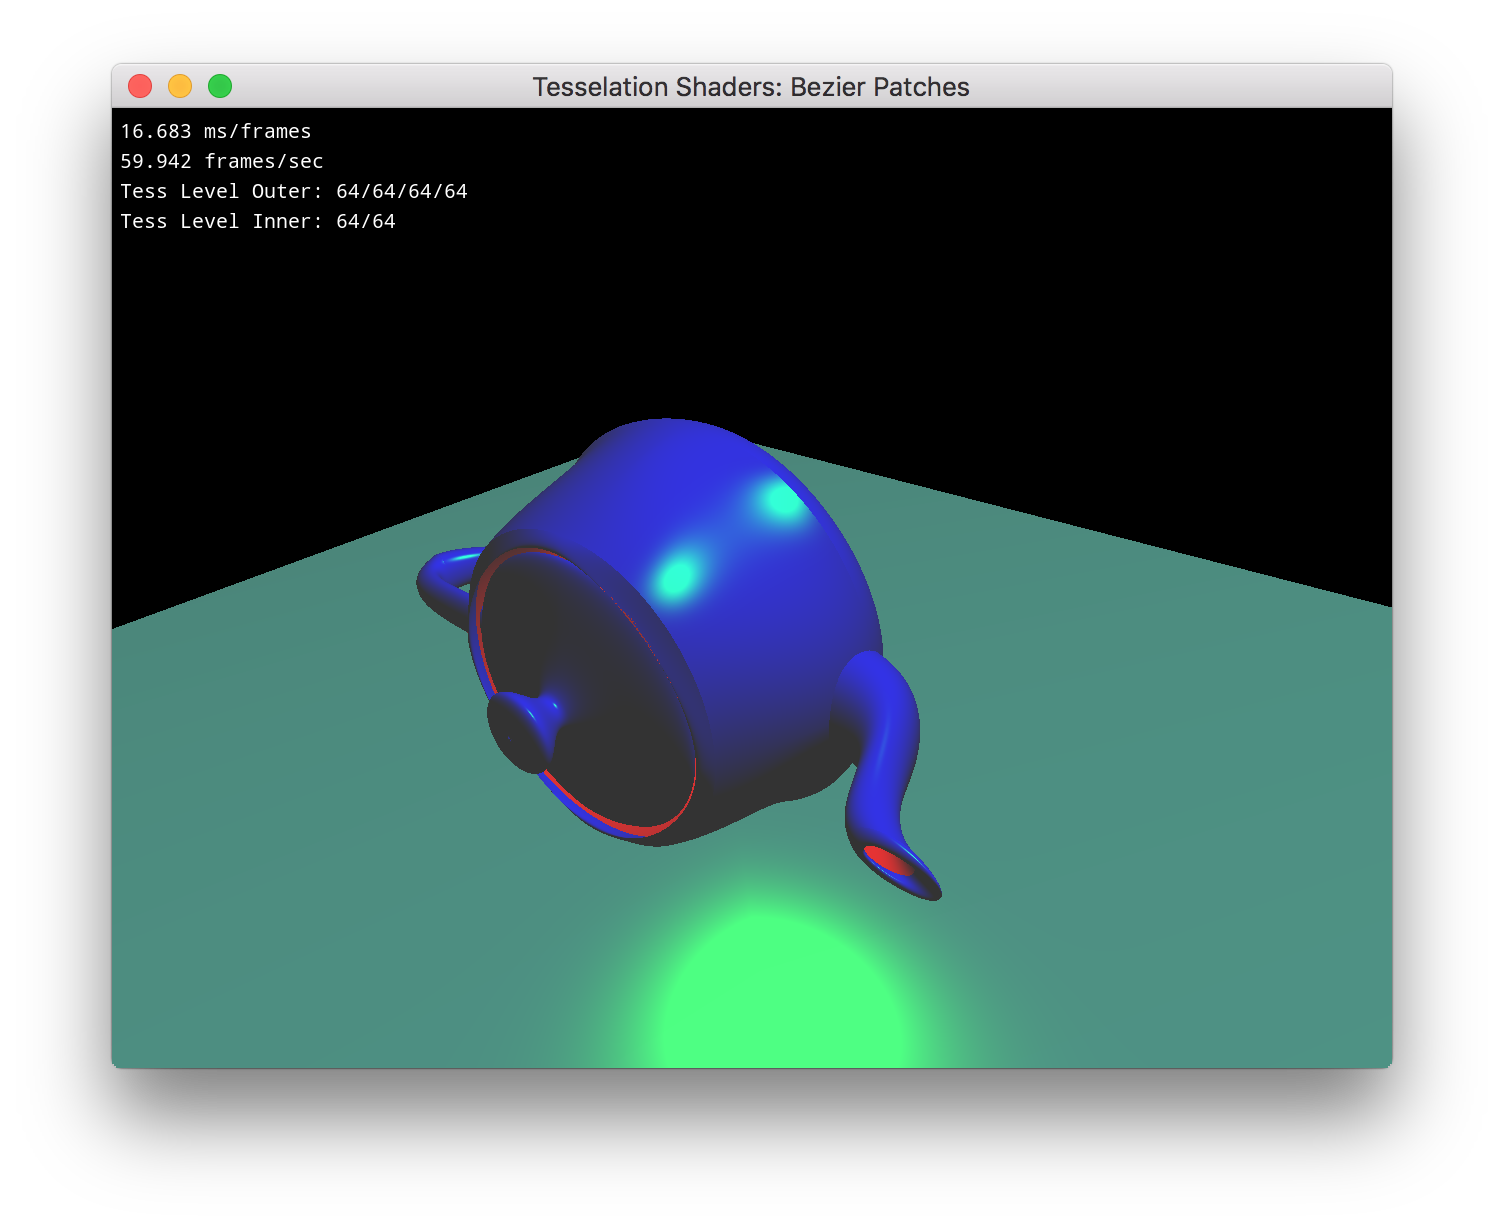
And if you hide the control points and wireframe, we get a nice shiny round teapot! Notice the ground does not have the wireframe either.
Part IV - Create A Procedural Texture
There are two steps to this part and they all are
actually performed in the Fragment Shader for the most part (you may need to pass some uniforms and other values).
Step I: Generate Perlin Noise.
This page has a good write up and technical
explanation of how to implement Perlin Noise. While
glm
has a built in noise function (
glm::noise()
), we want to implement it ourselves. Another good resource is Ken Perlin's
own website. We are going to use the vertex's position as our
texture coordinate for the 3D Noise Map. Once you are able to generate
3D noise, your teapot should be white, gray, and cloudy looking.
Step II: Apply a Procedural Pattern.
At this
point you now have a choice of what to do. You can choose to apply a
wood grain texture (see book) or apply a marble
texture (tutorial). For any of these techniques,
you will need to apply some number of octaves to your noise. Examples
of the wood grain and marble are shown below:
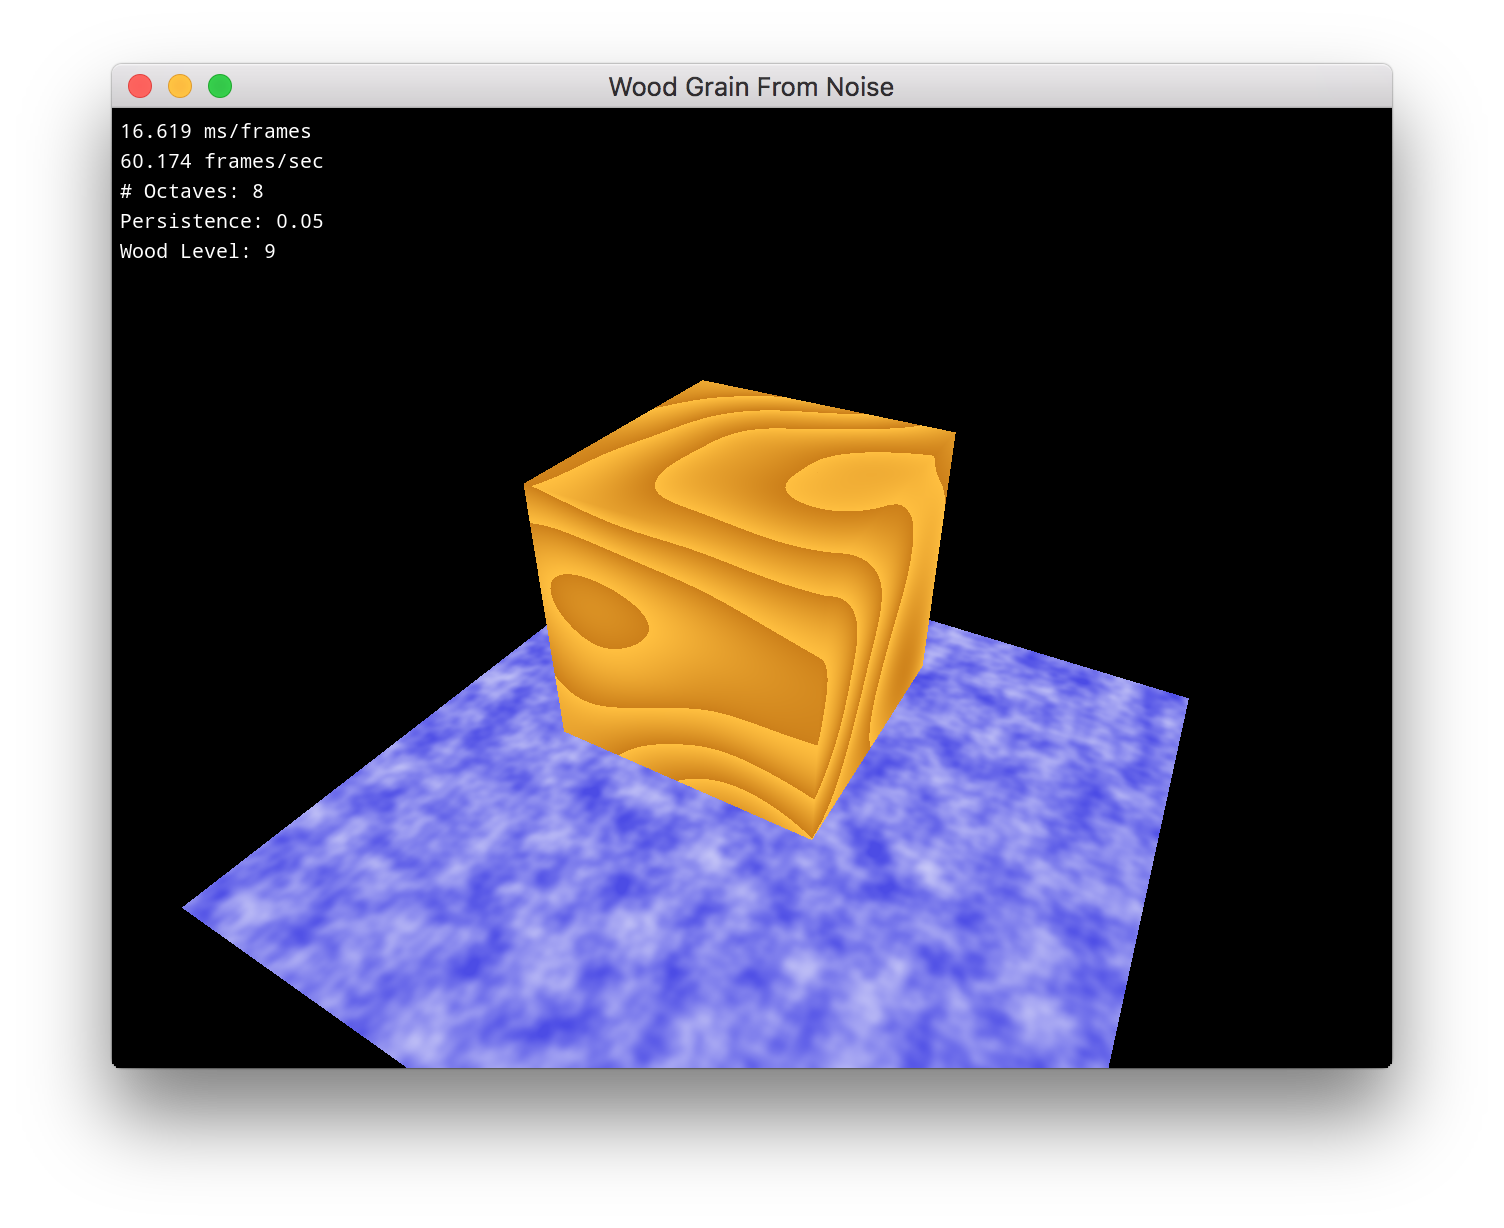
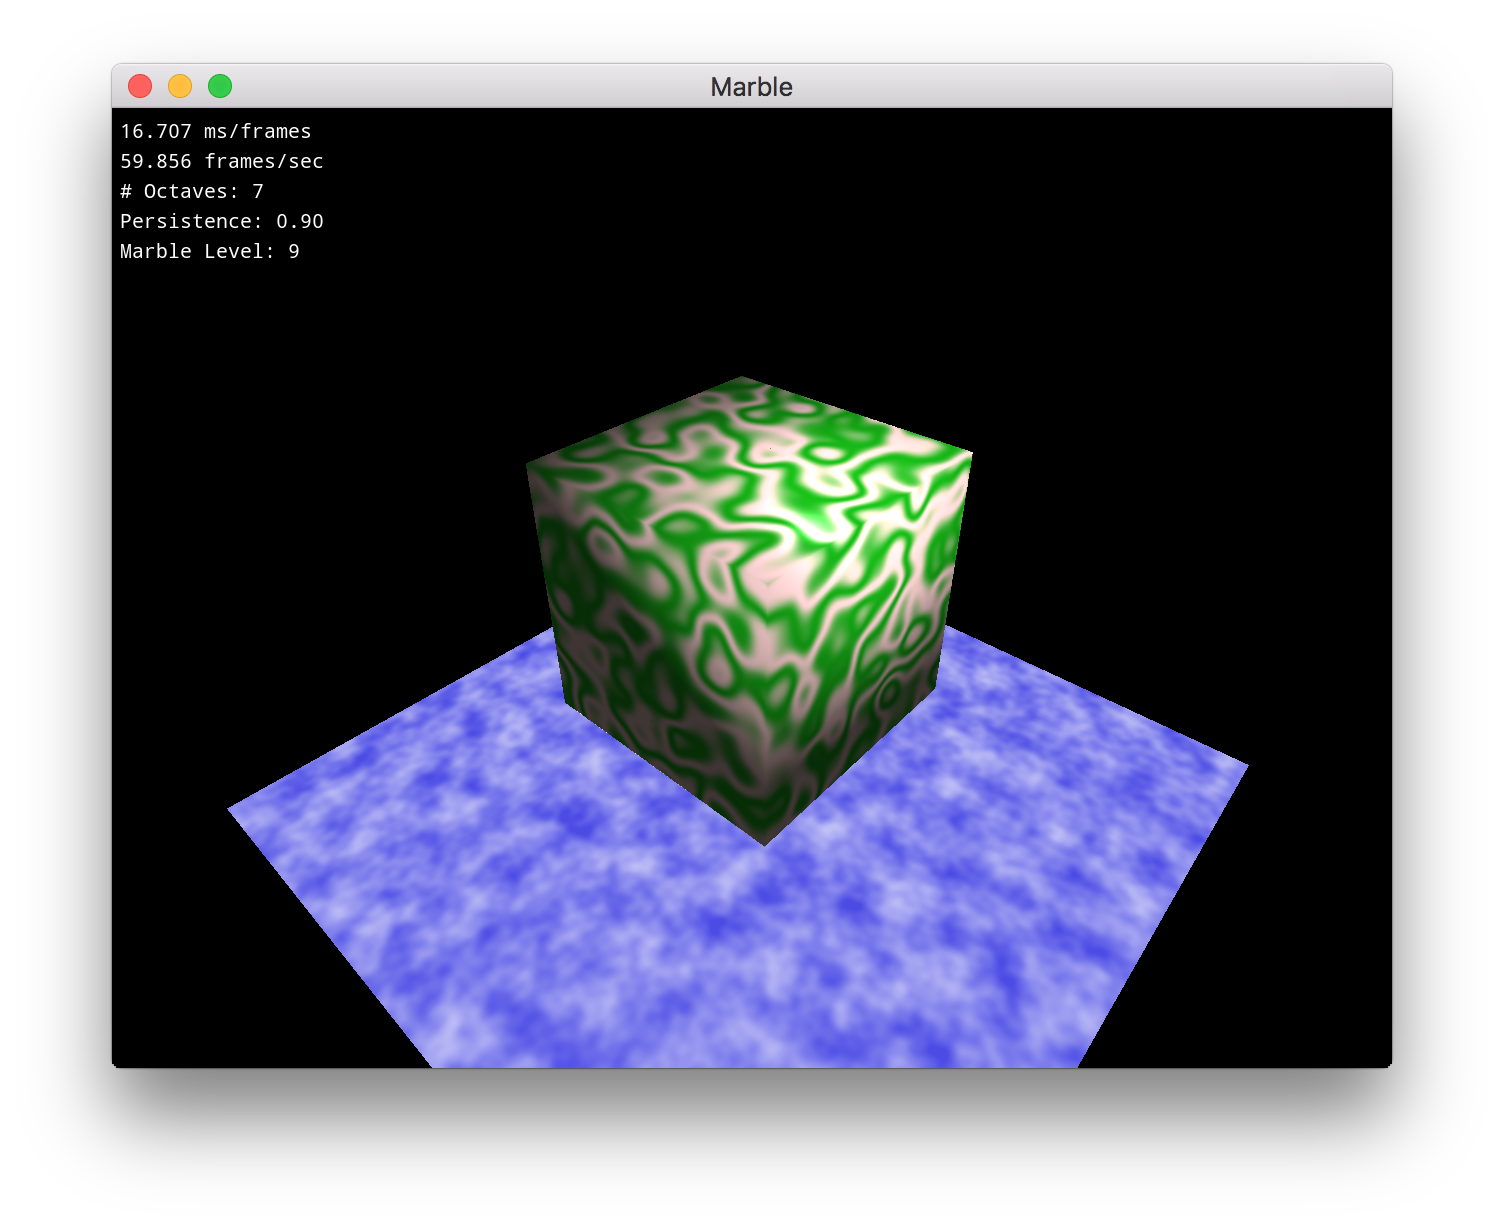
You should choose appropriate colors for the texture that you are applying. Additionally, you do not need to make your textures dynamic (i.e. user can change the number of octaves and persistence level). You may hard code these values into your shaders. However, choose appropriate values so your result "looks good".
Part V - Apply Time
Required for students in CSCI544
Extra Credit for students in CSCI444
Realistic or not, we now want our wood/marble pattern to vary with time. Apply the same wood/marble pattern but with time as the fourth dimension (reference).
Part VI - Use Shader Pipelines
We now have three different shader sets that are being applied to different components of our scene:
- A Vertex + Geometry + Fragment Shader Program: Applies the wireframe and Phong Shading to the ground plane.
- A Vertex + Tessellation + Geometry + Fragment Shader Program: Applies the tessellation and wireframe and Phong Shading to the control points.
- A Vertex + Tessellation + Fragment Shader Program: Applies the tessellation and wireframe and Procedural Texturing to the control points.
For these two programs, the Geometry + Fragment Shader are the same for both. The difference is the V and V + T steps. We'll turn these in to seperable programs and make pipelines out of them.
The separable programs are:
- The Vertex Shader used with the ground plane.
- The Vertex + Tessellation Shaders used with the control points.
- The Geometry + Fragment Shaders used with the wireframe and Phong shading.
- The Fragment Shader used with the Procedural Texture.
We'll then make three pipelines consisting of separable programs:
- 1 + 3
- 2 + 3
- 2 + 4
We'll apply the pipelines as follows:
- Pipeline 1 (1+3): apply to ground plane
- Pipeline 2 (2+3): apply to control points (can be toggled via keypress)
- Pipeline 3 (2+4): apply to control points (can be toggled via keypress)
Part VII - Create Your Website
In addition to creating this awesome looking teapot, modify your webpage from A1 to include several screenshots of your teaset. Feel free to position everything so the spoon lies in the cup next to the pot!
Documentation
With this and all future assignments, you are expeced to appropriately document your code. This includes writing comments in your source code - remember that your comments should explain what a piece of code is supposed to do and why; don't just re-write what the code says in plain English. Comments serve the dual purpose of explaining your code to someone unfamiliar with it and assisting in debugging. If you know what a piece of code is supposed to be doing, you can figure out where it's going awry more easily. (Interestingly enough, this code review of Doom 3's source code says the exact opposite - well written code should require no comments. Well, we don't work at id so we're going to comment.)
Proper
documentation also means including a
README.txt
file with your submission. In your submission folder, always include a
file called
README.txt
that lists:
- Your Name / HeroName
- Homework Number / Project Title
- A brief, high level description of what the program is / does
- A usage section, explaining how to run the program, which keys perform which actions, etc.
- Instructions on compiling your code
- Notes about bugs, implementation details, etc. if necessary
- How long did this assignment take you?
- How fun was this assignment? 1-10 (1 - discontinue this assignment, 10 - I wish I had more time to make it even better!)
Grading Rubric for CSCI 444
Your submission will be graded according to the following rubric.
| Percentage | Requirement Description |
| 10% | Model read into VAO & VBOs |
| 10% | Vertex Shaders Created |
| 10% | TCS & TES Created |
| 15% | Wireframe Geometry & Fragment Shaders Created |
| 10% | Wood Grain or Marble Texture Procedural Fragment Shader Created |
| 10% | 3D Perlin Noise implemented (no points awarded for using glm::noise() |
| +10% | 4D Perlin Noise implemented (no points awarded for using glm::noise() |
| 10% | Appropriate number of octaves, persistence level, wood/marble level, colors chosen |
| 20% | Shader Pipelines created |
| 5% | Phong Shading & Procedural Texture can be toggled on/off of teapot. Wireframe can be toggled on/off with Phong Shading. |
Grading Rubric for CSCI 544
Your submission will be graded according to the following rubric.
| Percentage | Requirement Description |
| 10% | Model read into VAO & VBOs |
| 10% | Vertex Shaders Created |
| 10% | TCS & TES Created |
| 15% | Wireframe Geometry & Fragment Shaders Created |
| 10% | Wood Grain or Marble Texture Procedural Fragment Shader Created |
| 10% | 4D Perlin Noise implemented (no points awarded for using glm::noise() |
| 10% | Appropriate number of octaves, persistence level, wood/marble level, colors chosen |
| 20% | Shader Pipelines created |
| 5% | Phong Shading & Procedural Texture can be toggled on/off of teapot. Wireframe can be toggled on/off with Phong Shading. |
Submission
Please update your project so it produces an executable with the name userName_A2. When you are completed with the assignment, zip together your source code, README.txt, and www/ folder. Name the zip file, userName_A2.zip. Upload this file to Canvas under A2.
This assignment is due by March 05, 2021 by 11:59pm.