Welcome to your first data structures lab! Labs in this class will be guided exercises designed to strengthen your abilities as a programmer and your understanding of the course material. This particular lab requires you to set up your personal development environment, so you will each need a computer to work with. For most future labs, we will ask that you work with a partner or a team. For today, just start by introducing yourself to the people on your left and right. You are welcome to check your work today with your neighbors.
Note: while we intend for the work in these labs to be completed in class, if you are unable to complete the work during the class period, you may complete the lab later in your own time.
For this lab you will work with some simple code we provide, making sure you can compile and run code in the Cloud9 development environment. You will then answer a couple of simple questions in Canvas (most labs will have a bit more depth than this one). Note that each person on a team must answer the questions in Canvas to get credit for the lab! (This will be the case for all labs.)
Cloud9 is an online integrated development environment (IDE) that you can access anywhere you have an internet connection. You will get the same look and feel from every computer. And better yet, you have access to all your files from any computer as well!
You should have already received an invitation from Cloud9 to join the csci262fall2017 team (yes, the name has the wrong term in it - just roll with it). If you haven't already, go ahead and create an account. Once you're logged in, you'll see a blank window asking you to create a workspace.
Click the big plus sign that says "Create a new workspace." It is important that you follow these steps exactly to keep your work beyond this semester. Otherwise, at the end of the term when the team is removed, you will lose all your work.
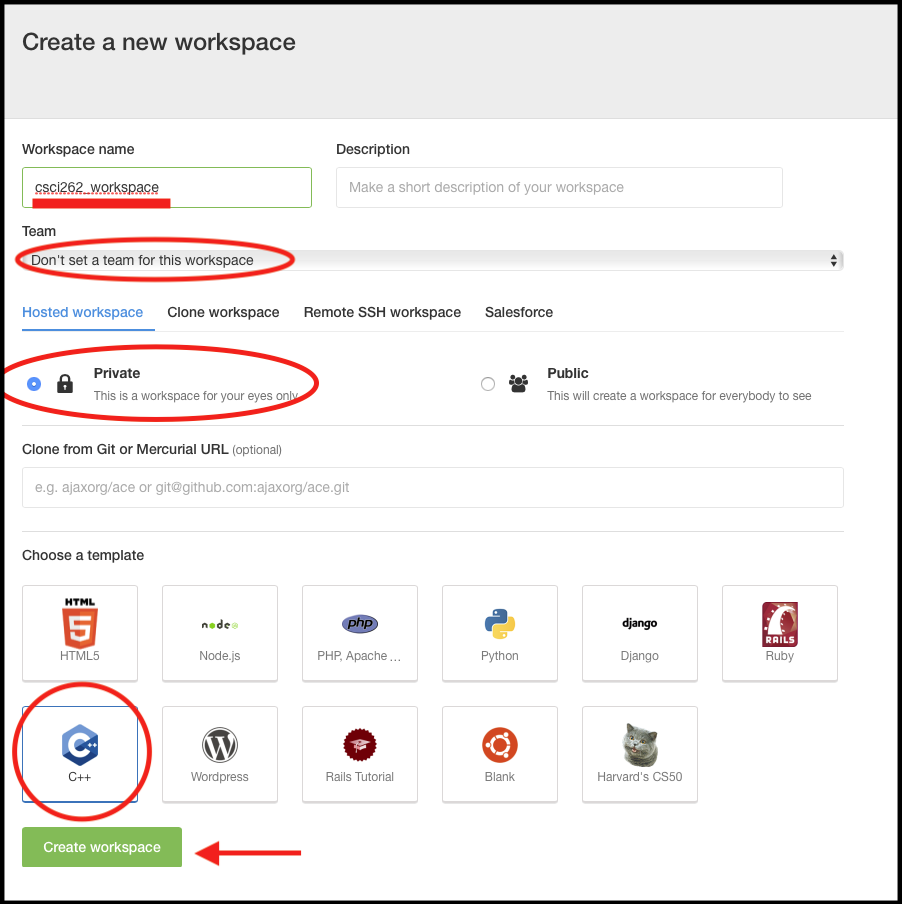
Give the workspace a name, such as "csci262_workspace". (It doesn't matter what you name it)
Next change the Team dropdown to "Don't set a team for this workspace."
Now check the radio button for a "Private" workspace.
Lastly, choose the template for "C++".
Click on "Create workspace" and you're done! You'll see a welcome message like below:
     ,-----.,--.                  ,--. ,---.   ,--.,------.  ,------.
    '  .--./|  | ,---. ,--.,--. ,-|  || o   \  |  ||  .-.  \ |  .---'
    |  |    |  || .-. ||  ||  |' .-. |`..'  |  |  ||  |  \  :|  `--,
    '  '--'\|  |' '-' ''  ''  '\ `-' | .'  /   |  ||  '--'  /|  `---.
     `-----'`--' `---'  `----'  `---'  `--'    `--'`-------' `------'
    -----------------------------------------------------------------


Hi there! Welcome to Cloud9 IDE!
With Cloud9, everything is set up for you. We will set two options however. From the top menu bar, select Cloud9 > Preferences.
First navigate to "User Settings" and check the box "Use an Asterisk (*) to Mark Changed Tabs". Next select "Themes" and pick your favorite colors if you like!
We also need to install a few libraries and tools that we will be using later in the course. Begin by downloading this file. Now upload it to your workspace. There are two ways to do this:
You can also skip the downloading and uploading steps by using the program wget from the terminal window in Cloud9. If you are comfortable using the terminal already, just put in:
wget https://cs.mines.edu/Courses/csci262/spring2018/labs/1-compile/setupCloud9.sh
Now, right click on the file in the sidebar and select "Open terminal here" from the menu. This will open a new tab where you will see something similar to below:
cpainter:~/workspace: $This is a Linux terminal prompt. We'll be using the linux terminal heavily this semester, so it might be worthwhile to look over the terminal command cheat sheet we've created for the class located here. Note that you can always reuse the previous terminal command by pressing the up arrow key on your keyboard within the terminal. Type or copy the following two commands into this terminal and be sure to hit enter after each one.
sudo chmod 744 setupCloud9.sh
sudo ./setupCloud9.sh
These two commands will run a script to download and install everything you need. Note that this may take some time, so don't worry if it's taking a while! You'll see lots of text flying by, some of it telling you the progress. A few times you will be prompted if you wish to continue. Type 'Y' for yes. When prompted if you want to enter a password, type 'no' to not set a password. When you see:
[100%] Done with Cloud9 setup!
You're all set up! Congrats, your development environment is fully set up!
Depending on its complexity, a software project will have many different files associated with it, such as the source code, header files, resource files (images, sounds), data files, and configuration files. Most IDEs, including Cloud9, require programmers to organize all of these files into an entity called a project.
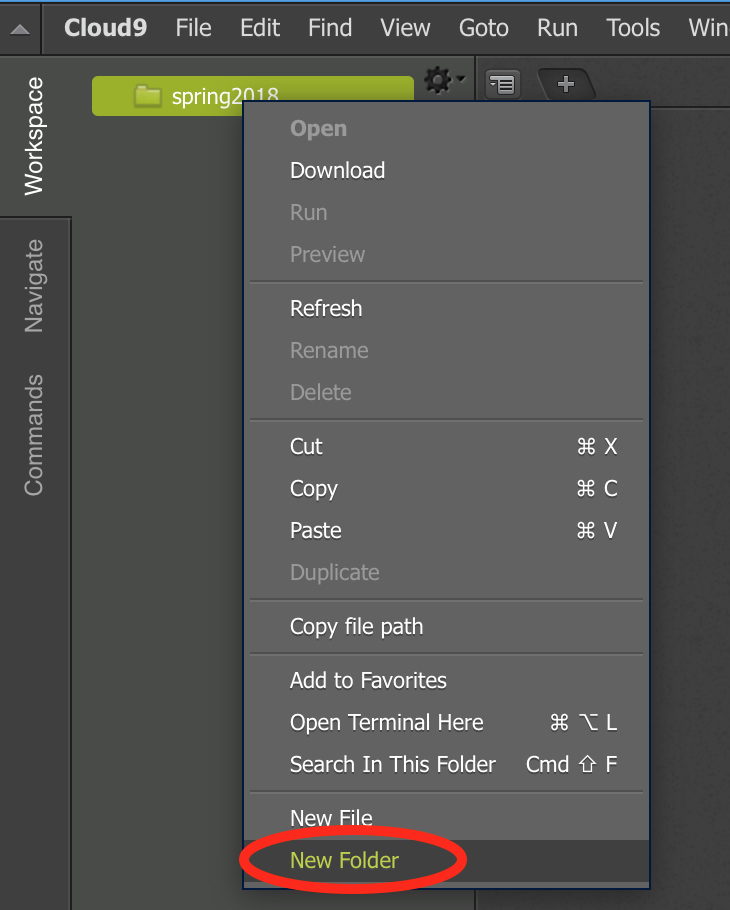
Before you begin, delete the files that Cloud9 gives you by default, and the setupCloud9.sh file. You can highlight the files, right click, and select "Delete" from the pop-up menu.
To create your project, in the left hand window, right click on the name of your workspace (the one you just created). Select "New Folder" and name it "lab01" or something similar.
For many projects and labs, we will provide starter code. For others, you may be writing code from scratch. For this lab, you will upload four files: lab01.cpp, muddler.h, muddler.cpp, and a makefile. Go ahead and download these somewhere on your computer, and then you can upload to your new folder in a couple of different ways.
You can simply drag the files from your computer into the folder - Cloud9 will upload the files and put them in the new folder. Alternately, you can select the new folder, then select "Upload Local Files..." from the File menu in Cloud9, which will then give you further instructions.
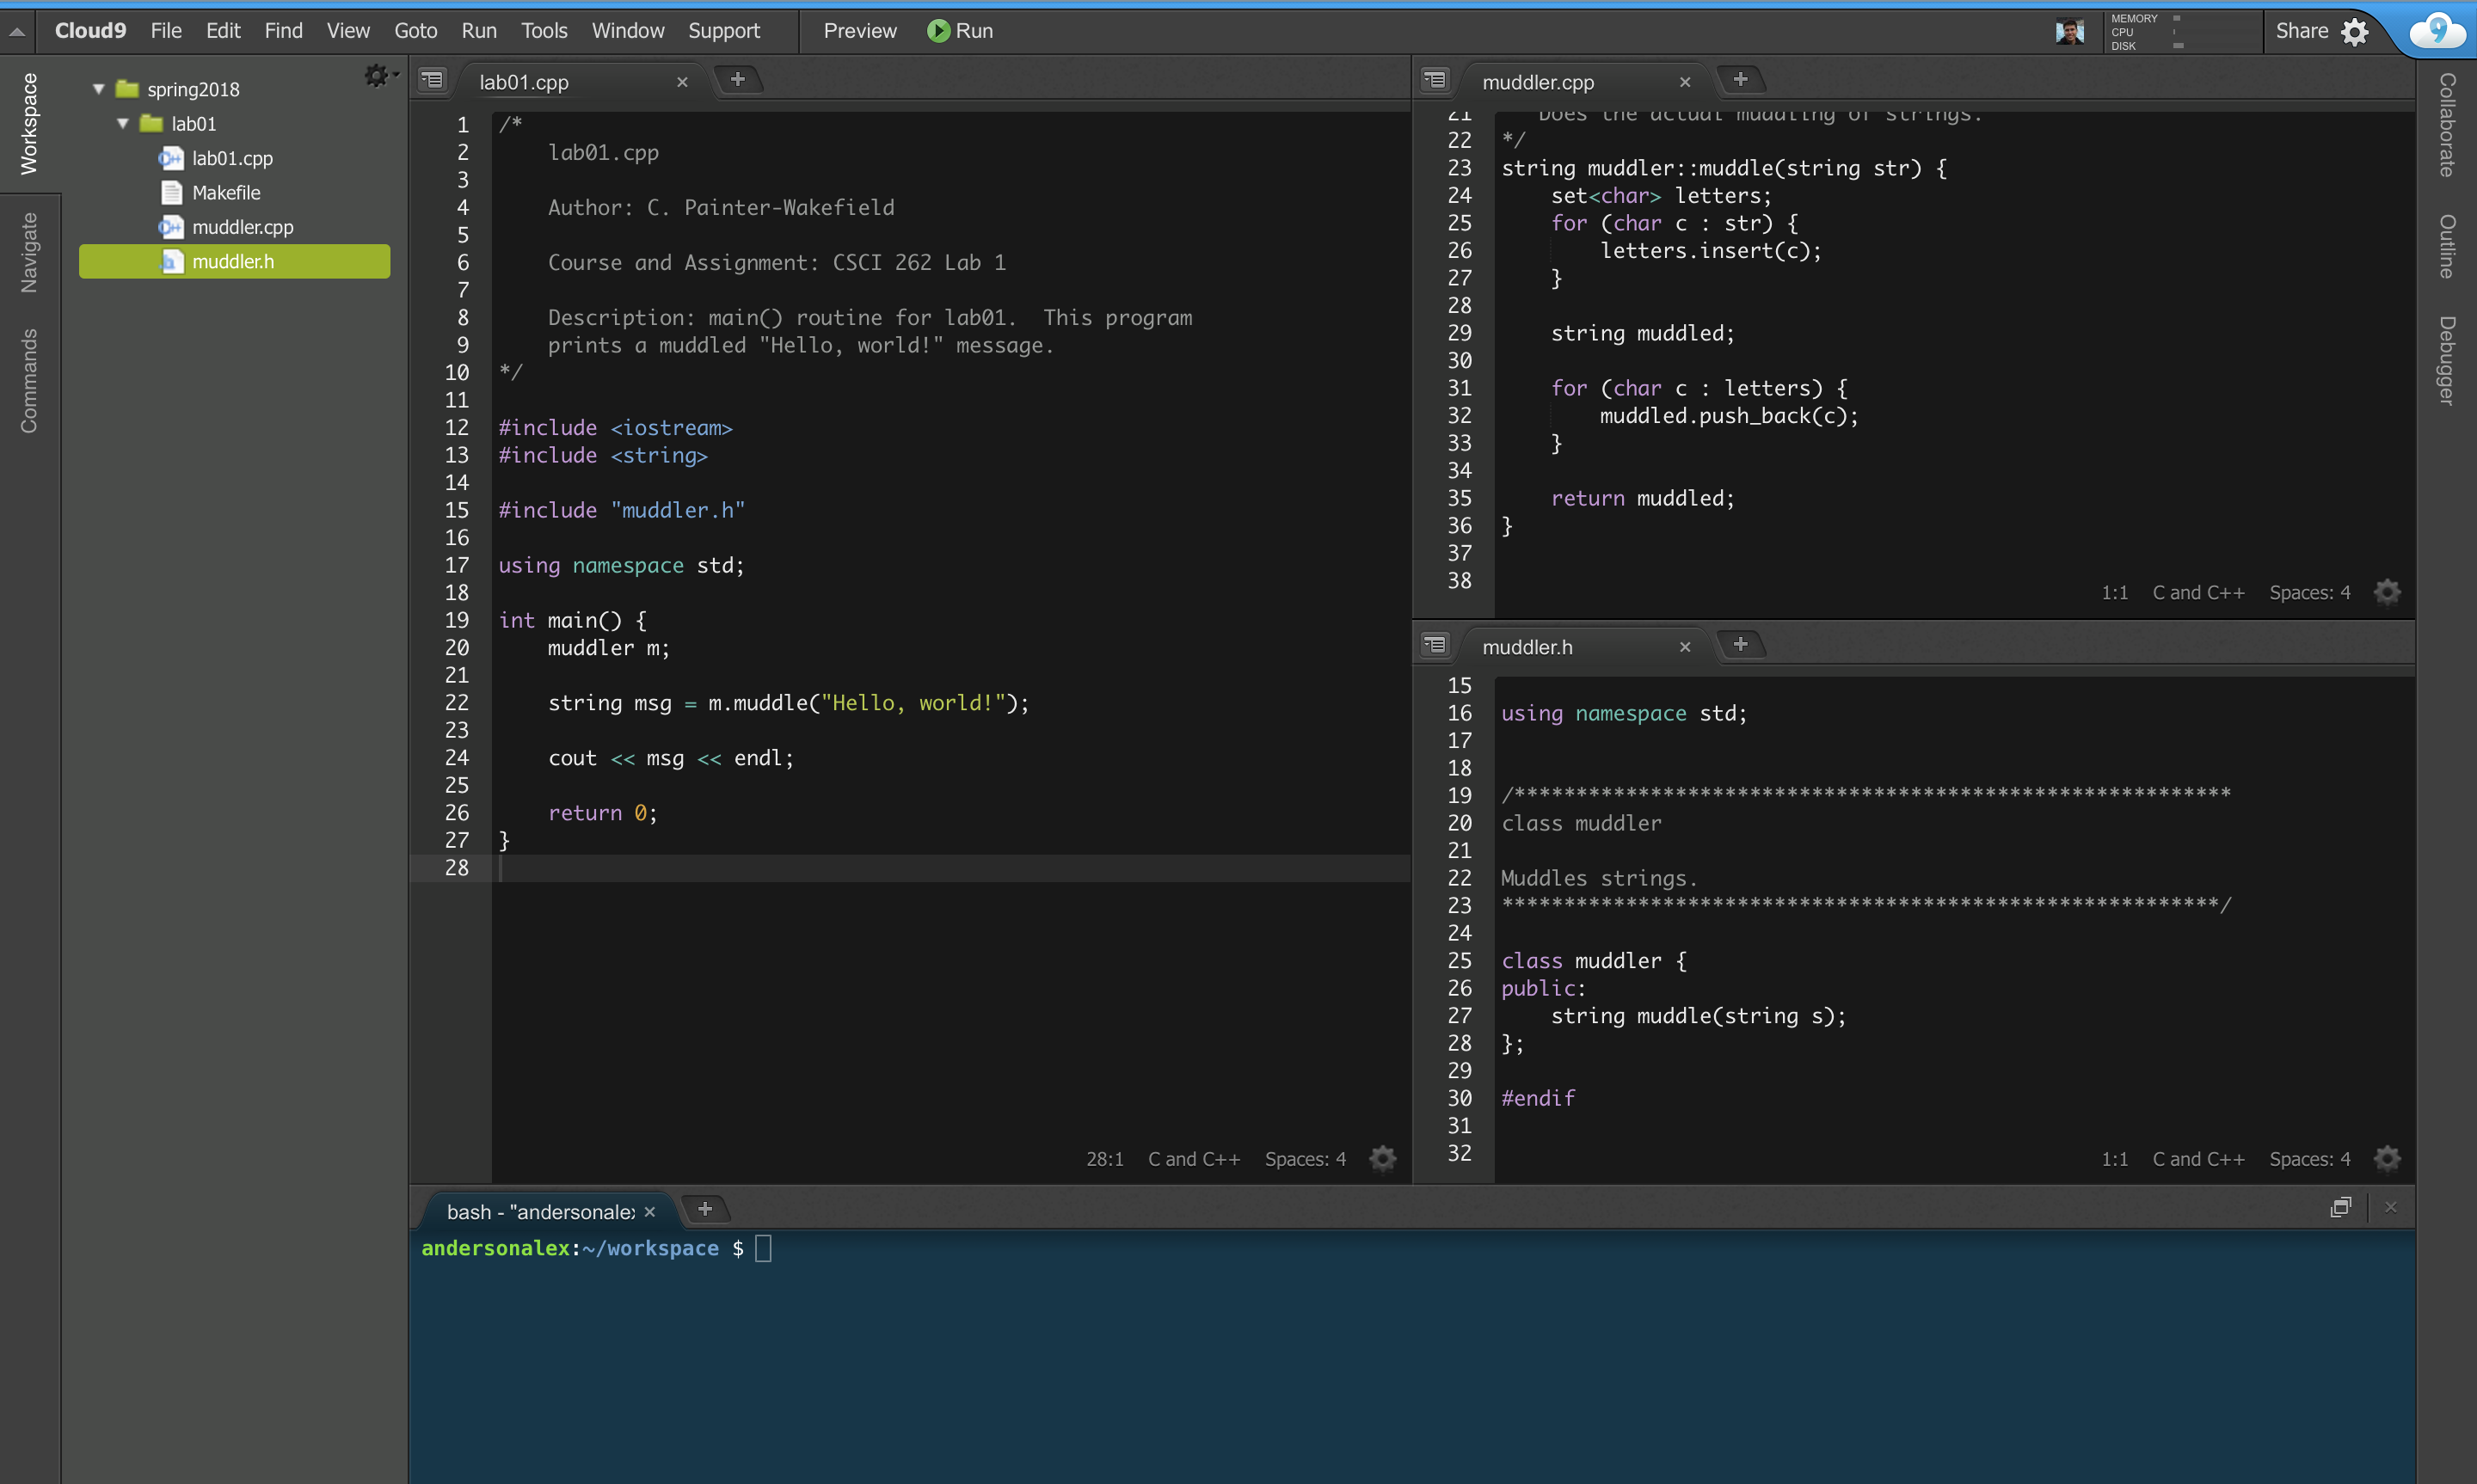
Make sure you have all three files before moving on to the next step! Spend a little time looking at the source code in these files (double-click on files to open in the editor). See if you can guess what the program does.
OK, this part is a bit tricky if you are uncomfortable with using the command line in linux. You are going to use the terminal and GNU Make to get your project running.
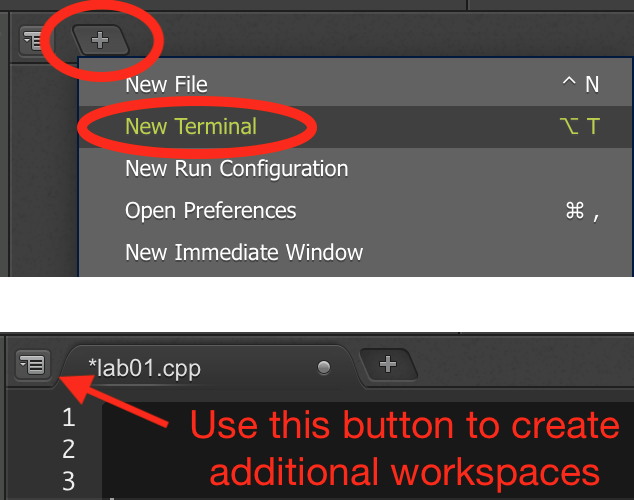
First, you need to get a terminal into the folder containing your files. Click on an open terminal window, or open a new one if you need using the "+" tab label on any of your workspaces, (note that elite programmers usually place their terminals in a workspace at the bottom of the screen as shown. This lets the programmer edit their code in the above workspace and test it in the below workspace). If you have trouble locating the "+" tab, a screenshot of it is shown below.
Once you've located a terminal to use, enter the following command:
ls
to see what files and directories you currently have. (ls stands for "list").
If you named your directory "lab01", then your output should just look like
lab01/
To move the terminal's working directory to the directory you've created for this lab, we'll use the command cd ("change directory"). cd takes a directory as its argument and makes this directory the new working directory. If your directory is called "lab01", then the following command will accomplish what we want:
cd lab01
Once you have used cd to move into your code directory, use ls to verify that the four files you uploaded are there. If so, you're ready to compile! If not, you might need to repeat some of the steps above. First, you can use the command
cd ..
to go back up one directory level. In a linux/unix terminal, ".." stands for the parent directory (i.e. the directory that contains my working directory). You can also use the command pwd ("print working directory") to see where you are in the directory hierarchy. Finally, just using cd with no arguments will always take you back to the home directory, which is the directory containing your workspace directory in our case.
OK, let's compile. Since we've provided a makefile for this project, compiling is very easy using GNU make. Simple enter the command:
make
It's that simple! GNU make then looks at the compilation instructions in the given makefile and compiles the code into an executable named "lab01". You should see a few lines of output during the compilation process that are normal, but make will alert you to any errors if they occur. If an error occurs, read the error and see if you can figure out what's going on. If you can't figure out what the error is trying to tell you, ask for an instructor's help. If compilation went smoothly, you should see a new file called "lab01" in your project folder.
If you take a peek inside this new file, you will see Cloud9 trying to interpret compiled code as text, which doesn't look very pretty. You'll also see some other new files appear in your project folder, all of them ending in ".o". These are called object files and they're used by the compiler to convert each file into the final executable. You don't need to know anything about these besides that they exist and you should see them appear if everything is working smoothly with make!
If everything did work, verify that you now have a file named "lab01" in your directory using ls. It should appear in a different color within the terminal's output, and should have an asterisk beside the name, indicating that it is a program file you can run.
Yay, running code! To execute a program in the current directory, you use the name of the program, preceded by the "path" to the program. You can use the shortcut "." to represent the current directory, so to run the program lab01, type in the following:
./lab01
It should print out a string on its own line. This string will be your answer for the lab1 quiz in Canvas.
This really has nothing to do with the rest of the lab, but for 5 points (half the lab), please put a post on Piazza telling us a little about yourself. If you are comfortable doing so, please post a picture of yourself - that will help us learn your names a bit faster. We'd be delighted to hear anything about you you want to share - your hobbies, career goals, etc!
If you have completed all of the above successfully (and there is time left in the lab), this would be a good time to mess around with Cloud9 and the code we just gave you. See if you can modify the code, recompile (using the same command as before), and see what your changes did.
When you are done, you can simply close the browser window containing your Cloud9 environment; when you return, everything will be in the same state as you left it.
Now, enjoy your weekend!