→This assignment is due by Thursday, September 16, 2021, 11:59 PM.←
→ As with all assignments, this must be an individual effort and cannot be pair programmed. Any debugging assistance must follow the course collaboration policy and be cited in the comment header block for the assignment.←
→ Do not forget to complete the following labs with this set: L2A,
L2B,
L2C
←
→ Do not forget to complete the APT for this set.←
· Instructions · Rubric · Submission ·

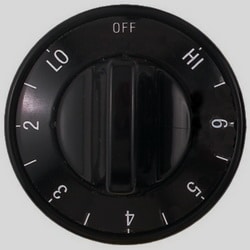 Many electric stoves have a simple dial with numbers to represent the temperature of the burner. The dials may
display the integers 1 through 10 (or 1 through 7 or something else), but the dial can be set to any value
in between the numbers as well. To further
complicate the cooking process, recipes don't tell the home chef to set their stove to 5, the recipe will say to use
medium heat. This program will allow the home chef to convert any value to a heat range & vice versa. Plus, the
home chef won't be restricted to a stove that is limited to using 1 to 10 either!
Many electric stoves have a simple dial with numbers to represent the temperature of the burner. The dials may
display the integers 1 through 10 (or 1 through 7 or something else), but the dial can be set to any value
in between the numbers as well. To further
complicate the cooking process, recipes don't tell the home chef to set their stove to 5, the recipe will say to use
medium heat. This program will allow the home chef to convert any value to a heat range & vice versa. Plus, the
home chef won't be restricted to a stove that is limited to using 1 to 10 either!
Instructions: Part I - Specify The Range
Prompt the user to enter a range, denoted by a min and a max. We'll denote
the input values as [a, b] and as long as a ≠ b then we have a valid range.
Store these values as two real value measurements, i.e., your
program should prompt the user to enter the two real values (which
should be stored as two double or float variables). Once done, write code to
determine if the pair of real value measurements make a valid range. If
yes, then restate the values of the range ordered first by the min and then by the max (see hints below). If
no, your program should politely terminate with an appropriate error
message.
The user will first enter values a and b. But the user is allowed to enter
the pair of real values in any order; in other words, your program should
not assume the first value is the smaller of the two values. An example of your program at this point is below.
Enter the first value of the range: 5
Enter the second value of the range: 7

Valid!
Min: 5
Max: 7
Enter the first value of the range: 5
Enter the second value of the range: 5
Invalid.Part I Hints
- Due to the imprecise nature of floating point variables, you cannot
directly compare two floating point variables with the
==operator. Instead, you should do the comparison using aTOLERANCEconstant (e.g.,TOLERANCE == 0.000001) in the following way:
// The fabs function (defined in cmath) returns the
//   absolute value of a given floating point number.
// Thus, if the following equation is true, then we assume a == b.
// fabs(a - b) <= TOLERANCE- The
TOLERANCEconstant represents the error we are willing to accept when comparing two floating point values for equality; in other words, if two values are different byTOLERANCE(or less), then we consider the two values as equivalent. In your program, declare aTOLERANCEconstant and set it to0.000001(10-6 is a commonly used error threshold, the exact value used would be dependent upon the precision of the application you are developing). - A range is possible IFF the first value does not equal the second value.
- A range is possible IFF the first value and the second value differ by at least
9*TOLERANCE(0.000009). For the next step we want our ensure our range spans at least nine error threshold values (9e-6)
Part I Test Values
Here are some known input/output values that you can test against. Be sure to try your own to verify the code works!
| Inputs | Classification | Purpose of Test |
|---|---|---|
| 1 10 | Valid | 1 ≠ 10 |
| 10 1 | Valid | 10 ≠ 1 Values not in min max order |
| 12 24 | Valid | Values do not include 1 |
| -2 -1 | Valid | Values are negative |
| -1 -3 | Valid | Values are negative Values are not in min max order |
| -10 3 | Valid | Values are negative and positive |
| 0.25 0.75 | Valid | Values are floating point values |
| 5 5 | Invalid | Invalid range, 5 == 5 |
| 5.000001 5.000006 | Invalid | Invalid range, values are within 9*TOLERANCE |
Instructions: Part II - Range Stats
If the result of Part I determines we do have a valid range, then we will continue to print out some stats about our range - specifically where the boundaries between Low & Medium and Medium & High cooking would be. We will do this by dividing our range in to three equal segments. The Low & Medium boundary lies one third of the way through the range. The Medium & High boundary lies two thirds of the way through the range. An example is below:
Enter the first value of the range: 1
Enter the second value of the range: 10

Valid!
Min: 1
Max: 10

Low/Medium Boundary:  4
Medium/High Boundary: 7
Part II Test Values
Here are some known input/output values that you can test against. Be sure to try your own to verify the code works!
| Inputs | Low-Medium Boundary | Medium-High Boundary | Purpose of Test |
|---|---|---|---|
| 1 10 | 4 | 7 | Integer range |
| 10 1 | 4 | 7 | Input values not in min max order |
| -3 0 | -2 | -1 | Values are negative |
| -3 3 | -1 | 1 | Values are negative and positive |
| 3 7 | 4.33333 | 5.66667 | Float range |
| 5.00001 5.00010 | 5.00004 | 5.00007 | Small values |
Instructions: Part III - Classify a Temperature
Now ask the user to enter in a temperature t. Print out if this value is in the Low range,
the Medium range, the High range, or out of the range. If a temperature is within the TOLERANCE of the min or max,
then classify the temperature as being in the Low range and High range, respectively. If a temperature is within the TOLERANCE
of the two Medium boundaries, then classify the temperature as being in the Medium range. Example runs of the program are shown below:
Enter the first value of the range: 1
Enter the second value of the range: 10

Valid!
Min: 1
Max: 10

Low/Medium Boundary:  4
Medium/High Boundary: 7

Enter a temperature: 3

3 is a Low temperature.
Enter the first value of the range: 1
Enter the second value of the range: 10
Valid!
Min: 1
Max: 10
Low/Medium Boundary: 4
Medium/High Boundary: 7
Enter a temperature: 6.5
6.5 is a Medium temperature.Enter the first value of the range: 1
Enter the second value of the range: 10
Valid!
Min: 1
Max: 10
Low/Medium Boundary: 4
Medium/High Boundary: 7
Enter a temperature: 13
13 is out of range.If the user enters a value that is outside of the ranges, then the program will end here.
Instructions: Part IV - Randomize The Temperature
Now for the tricky part. Once we have classified the temperature in to the corresponding range, we are going to go generate another temperature they could use within the same range. We need our program to generate a random real value that's within the range of the values represented by the range. An example of the completed program is shown below.
Enter the first value of the range: 1
Enter the second value of the range: 10

Valid!
Min: 1
Max: 10

Low/Medium Boundary:  4
Medium/High Boundary: 7

Enter a temperature: 3

3 is a Low temperature.

You could also use 2 as a temperature.
Enter the first value of the range: 1
Enter the second value of the range: 10
Valid!
Min: 1
Max: 10
Low/Medium Boundary: 4
Medium/High Boundary: 7
Enter a temperature: 6.5
6.5 is a Medium temperature.
You could also use 5.5 as a temperature.Instructions: Part XC - Getting More Specific
For extra credit, accommodate recipes that call for temperatures in the Medium-Low range or the Medium-High range. To compute the Medium-Low range, divide the Low range in to three equal segments as well. The top third corresponds to the Medium-Low range. Likewise to compute the Medium-High range, divide the High range in to three equal segments as well. The bottom third corresponds to the Medium-High range. If the user entered 1 and 10 as the min/max of the range, then the boundaries for each are as follows:
- [1, 3) - Low
- [3, 4) - Medium-Low
- [4, 7] - Medium
- (7, 8] - Medium-High
- (8, 10] - High
Take note of which boundaries are inclusive or exclusive.
Additionally, to receive full extra credit points be sure
- That the initial min/max range entered by the user can be divided finely enough within the allowable
TOLERANCE. - Put in your top comment block that you have completed the extra credit so the graders know to look for and test for it.
Grading Rubric
Your submission will be graded according to the following rubric.
| Points | Requirement Description |
| 10 | APT2 completed through AutoGrader. |
| 2 | All code submitted properly. |
| 6 | All labs completed and submitted. |
| +2 | L2C Extra Credit. |
| 3 | Part I range classified and sorted correctly. |
| 4 | Part II range boundaries computed correctly. |
| 6 | Part III user entered temperature classified correctly. |
| 6 | Part IV value computed as valid random floating point value. |
| 1 | Input/Output flow matches above examples. |
| +2 | A2 Extra Credit. |
| 2 | (1) Comments used. (2) Coding style followed. (3) Appropriate variable names, constants, and data types used. (4) Instructions followed. |
| 40 | Total Points |
→This assignment is due by Thursday, September 16, 2021, 11:59 PM.←
→ As with all assignments, this must be an individual effort and cannot be pair programmed. Any debugging assistance must follow the course collaboration policy and be cited in the comment header block for the assignment.←
→ Do not forget to complete the following labs with this set: L2A,
L2B,
L2C
←
→ Do not forget to complete the APT for this set.←
Submission
Always, always, ALWAYS update the header comments at the top of your main.cpp file. And if you ever get stuck, remember that there is LOTS of help available.
It is critical that you follow these steps when submitting homework. You can view these steps by watching the Windows / Mac video.
If you do not follow these instructions, your assignment will receive a major deduction. Why all the fuss? Because we have several hundred of these assignments to grade, and we use computer tools to automate as much of the process as possible. If you deviate from these instructions, our grading tools will not work.
Submission Instructions
Here are step-by-step instructions for submitting your homework properly:
-
Make sure you have the appropriate comment header block at the top of every source code file for this set. The header
block should include the following information at a minimum.
Be sure to fill in the appropriate information, including:/* CSCI 261: Assignment 2: A2 - This One Goes To 11
* * Author: XXXX (INSERT_NAME) * Skip Days Used: #
* Skip Days Remaining: #
* Resources used (Office Hours, Tutoring, Other Students, etc & in what capacity): * // list here any outside assistance you used/received while following the * // CS@Mines Collaboration Policy and the Mines Academic Code of Honor * * XXXXXXXX (MORE_COMPLETE_DESCRIPTION_HERE) */- Assignment number
- Assignment title
- Your name
- How many skip days you are applying to this assignment (if you are applying none, still enter zero)
- The number of skip days you have left for the remainder of the semester (keep track of how many you have used across all assignments)
- If you received any type of assistance (office hours - whose, tutoring - when), then list where/what/who gave you the assistance and describe the assistance received
- A description of the assignment task and what the code in this file accomplishes.
- File and folder names are extremely important in this process.
Please double-check carefully, to ensure things are named correctly.
- The top-level folder of your project must be named
Set2 - Inside
Set2, create 4 sub-folders that are required for this Set. The name of each sub-folder is defined in that Set (e.g.L2A,L2B,L2C, andA2). - Copy your files into the subdirectories of
Set2(steps 2-3), zip thisSet2folder (steps 4-5), and then submit the zipped file (steps 6-11) to Canvas. - For example, when you zip/submit
Set2, there will be 4 sub-folders calledL2A,L2B,L2C, andA2inside theSet2folder, and each of these sub-folders will have the associated files.
- The top-level folder of your project must be named
- Using Windows Explorer (not to be confused with Internet Explorer), find the file
named
"main.cpp"located inside the folder for the particular lab or homework assignment you will submit.
STOP: Are you really sure you are viewing the correct assignment's folder? - Now, for A2, right click on the
main.cppto copy the file. Then, return to theSet2/A2folder and right click to paste the file. In other words, put a copy of your homework'smain.cppsource code into theSet2/A2folder.
Follow the same steps for L2A, to put a copy of your lab'smain.cppinto theSet2/L2Afolder. Repeat this process forSet2/L2B,Set2/L2C.
STOP: Are you sure yourSet2folder now has all your code to submit?
- Now, right-click on the
"Set2"folder.- In the pop-up menu that opens, move the mouse
"Send to..."and expand the sub-menu. - In the sub-menu that opens, select
"Compressed (zipped) folder".
STOP: Are you really sure you are zipping aSet2folder with sub-folders that each contain amain.cppfile in it?
- In the pop-up menu that opens, move the mouse
- After the previous step, you should now see a
"Set2.zip"file.
- Now visit the Canvas page for this course
and click the
"Assignments"button in the sidebar.
- Find Set2, click on it, find the
"Submit Assignment"area, and then click the"Choose File"button.
- Find the
"Set2.zip"file created earlier and click the"Open"button.
STOP: Are you really sure you are selecting the right homework assignment? Are you double-sure?
- WAIT! There's one more super-important step. Click on the blue
"Submit Assignment"button to submit your homework.
- No, really, make sure you click the
"Submit Assignment"button to actually submit your homework. Clicking the"Choose File"button in the previous step kind of makes it feel like you're done, but you must click the Submit button as well! And you must allow the file time to upload before you turn off your computer!
- Canvas should say "Submitted!". Click "Submission Details" and you can download the zip file you just submitted. In other words, verify you submitted what you think you submitted!
In summary, you must zip the "Set2" folder
and only the "Set2" folder, this zip folder must have several sub-folders, you must name all these folders correctly, you must submit the correct zip file for this
homework, and you must click the "Submit Assignment" button. Not doing these steps is like bringing your
homework to class but forgetting to hand it in. No concessions will be made for
incorrectly submitted work. If you incorrectly submit your homework, we will not be able to
give you full credit. And that makes us unhappy.
→This assignment is due by Thursday, September 16, 2021, 11:59 PM.←
→ As with all assignments, this must be an individual effort and cannot be pair programmed. Any debugging assistance must follow the course collaboration policy and be cited in the comment header block for the assignment.←
→ Do not forget to complete the following labs with this set: L2A,
L2B,
L2C
←
→ Do not forget to complete the APT for this set.←